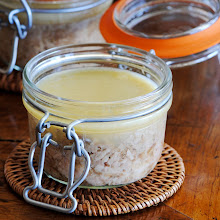
Wednesday, November 25, 2009

SMOKEY HAM HOCK LIQUOR

i think i'm into broths right now and this one is a winner...

SMOKEY HAM HOCK LIQUOR...it's like LIQUID BACON !!!

they're ugly, no kidding...but dangerously delicious.

these three HOCKS were beauties. i didn't realize 'till later, and a bit more ham hock experienced, that i could have just used one. besides the fact that each one of these are huge, these were smoked so well that each one packed quite a smokey punch. so use what you think is right. i'm glad i used all three because the meat it ever so tasty.


mmmm...so many possibilities.
how about using this for your next butternut squash soup?...a white bean puree?...just this liquidy gold to cook your rice... or couscous?...geez, just blanch your veggies in it...yummm!
for this first little smokey broth soup i decided to go simple. i boiled some skinned boned chicken breasts in the broth and added the white beans and arbol chilies...that's it. it was so clean and simple tasting, but with the depth of a complex broth...complex?...nope.

here's what i did...LIQUID BACON BROTH...easy peezy

get yourself some smoked ham hocks. 1, 2 or 3 will do (freeze one for later if you want to have one ready on hand...and you will!). ask the butcher if you don't see them out front.

1 large onion cut into 4 or 6

4-7 cloves peeled crushed garlic

5-6 dried arbol chilis (optional)

place everything in a large pot with enough water to cover everything.

bring to a boil, then turn down to a simmer. simmer for a few hours until hocks are tender and skin and meat are just about falling off the bone. remove from pot and set aside until cool to the touch. while you're waiting, strain liquid. i like to use cheese cloth or paper towel. it really makes the broth much more clear and grabs some of the fat as well. let your broth cool on the counter for a bit, then stick it in the fridge for a few hours. the fat will rise and be easy to remove. you probably already know all this, but this is a great way to really get rid of the fat. if you're not concerned about the fat you can skip all this and save a few hours...get right to business.

Saturday, November 21, 2009

PUMPKIN MAPLE GINGERBREAD

PUMPKIN MAPLE GINGERBREAD...

well, i must say...this cake is a looker. the outer crust two-tone look leads one to believe the inside will be just as exciting, but..alas. as you can see in the photo above, not so much. i mean, the light had to be just right in order to get a glimps of the marbling. i was surprised to even see it in the photo, because it's hard to see with the naked eye...by the way...naked eye...???...where did that ever come from? is your eye ever not naked ??... i was under the impression there would be two distinct flavors goin' on here. don't get me wrong..the cake IS fabulous, just not quite what i expected.


what's nice about this cake is that it's dense, therefore will serve alot of people. i'll bet you could get 24 nice slices, maybe more. the outside, as i mentioned has a shell-like crust so it can take a thinner slice. the inside is pretty dense. myself ?...i prefer a dense cake over light and airy. i like a cake with a little heft.


so, on with the recipe...click here for just this recipe
i found it at
Sing For Your Supper...great things here on this blog. i won't cut and paste the recipe because you should just go ahead and check out her blog...i think i'll be making the chili next.
this cake is pretty cool looking just on it's own and suits a breakfast bread this way...BUT you could definitely dress it up with a maple glaze or a butterscotch glaze or a whatever glaze...you know how i feel about glaze...love the drippage!

Tuesday, November 17, 2009

Paula Dean's Brown Butter Pecan Cake


Paula has really done it with this one. WOW ! is just about all i can say...

it's big, it's beautiful, it's dense, it's smooth, yet crunchy, it's sweet and decadent, and...

IT HAS 3 STICKS OF BUTTER.

well, you probably knew it had butter, but of course leave it to Paula to add that extra stick.


this was one perfect specimen of a cake. i couldn't stop taking pictures of it. i really didn't want to cut into it, but the aroma just kept calling...i think it was finally shouting at me...EAT ME !!!


just plain naked it was beautiful and would be great with just a little powdered sugar, but i'm a girl who loves her glaze. i love applying it and watching it slide down the sides.


this glaze is so easy. i've used it on my chocolate mud cakes and the quintuple chocolate cake. it always works well and stays nice and shiny the day of. this one, however, the next day did dull and get a matte finish (still looked great). another great bonus about this glaze is that it makes the cake travel well if needed. if you have to wrap it the seran won't stick. i hate it when frosting gets all over the place and messes everything up in transport.

EASY GLAZE
1 14 oz. can sweetened condensed milk
1 c. butterscotch chips
1 tsp vanilla
heat all this in a double boiler, stirring well 'till all is dissolved.
DONE. i like to pour a warm glaze on a cooled cake because i seem to have a little more control of the drippage. if your cake is still warm, the glaze might get too thin...although nothin's stoppin' ya from double glazing...

so enough with the photos and the blabbing about the cake...on with the recipe !!!

PAULA DEAN'S BROWN SUGAR PECAN POUND CAKE

1 1/2 c. butter, softened

2 1/2 c. dark brown sugar packed well

1/2 c. sugar

5 large eggs

3 c. all purpose flour

1/2 tsp baking powder

1/2 tsp salt

1 c. heavy whipping cream

1 c. chopped pecans

preheat oven to 325 degrees. spray a 12-15c cup bundt fluted bundt pan with nonstick baking spray with flour.

in a large bowl, beat butter and sugars at med. speed with an electric mixer until fluffy.. add eggs one at a time, beating well after each addition.

in a med. bowl, combine flour, baking powder, salt: gradually add to butter mixture, alternating with cream, beginning and ending with flour mixture. stir in pecans. pour into prepared pan. bake for 1 hour and 10 minutes to 1 hour and 20 minutes. or until wooden pick comes out clean. you might need to cover cake with an aluminum tent to prevent browning. let cool in pan for 10 min. remove from pan and let cool completely on wire rack.

Monday, November 16, 2009

Snickerdoodles

SNICKERDOODLES...an all time favorite not to be forgotten during the holidays. with all those other fancy decorated treats, don't leave this one out. i'll bet these will be the first to disappear. no one can resist a good Snickerdoodle...and these are not only good...they are fantastic!!!...follow this recipe to the T and they come out great every time.

i don't know who Mrs. Sigg is, but she sure has a killer Snickerdoodle recipe and she deserves an award for these. you can find it at allrecipes.com with all it's reviews here.
or i've just copied it for you below. it's straight forward and, as i mentioned, follow it exactly. my 1st batch i thought wasn't quite done at 8 minutes so i left them in for 11 mins. WRONG! although it didn't hurt them, they just weren't quite as chewy soft in the middle. the second, third and so on, at 8 mins., were perfectly chewy in the middle and crunchy on the outside just like a perfect doodle should be.

MRS. SIGG'S SNICKERDOODLES
Ingredients
1/2 cup butter, softened
1/2 cup shortening
1 1/2 cups white sugar
2 eggs
2 teaspoons vanilla extract
2 3/4 cups all-purpose flour
2 teaspoons cream of tartar
1 teaspoon baking soda
1/4 teaspoon salt
2 tablespoons white sugar
2 teaspoons ground cinnamon
Directions
Preheat oven to 400 degrees F (200 degrees C).
Cream together butter, shortening, 1 1/2 cups sugar, the eggs and the vanilla. Blend in the flour, cream of tartar, soda and salt. Shape dough by rounded spoonfuls into balls.
Mix the 2 tablespoons sugar and the cinnamon. Roll balls of dough in mixture. Place 2 inches apart on ungreased baking sheets.
Bake 8 to 10 minutes, or until set but not too hard. Remove immediately from baking sheets.
or...as immediately as possible.

trust me...don't leave these off your holiday cookie trays. i have a few left...a few i hid !!!, and i thought i would experiment with some icing, some Nutella or some butterscotch glaze etc. and dip them, slather them or just sandwich them...i could make a meal out of these babies...

Thursday, November 12, 2009

CHICKEN POZOLE VERDE


oh yesss...
i have found a new favorite.

CHICKEN POZOLE VERDE


served as a soup or a stew, a main course or a starter, this one is a winner. the verde broth is so good it would work well with any meat. tonight i had it with some fresh Tilapia and it was delicious. this yummy verde base might be something i would make ahead and freeze (haven't tried the freezing yet) in portions. you could just throw in some rotisserie chicken or pulled pork or white fish and call it a day. a delicious day.


this Pozole is so good i just couldn't wait for the condiments. actually, i would suggest trying it this way first to get the full flavor of the stew itself. sometimes one can get carried away with all the extras that you lose sight of the original.
.
hominy...what a fabulous little nugget that i must have forgot about. i haven't had it in years. i wasn't expecting it to bring such a great flavor to the dish. i couldn't pin point the flavor until i realized it was kind of like someone had infused, fresh off the press, corn tortillas into ever bite. you know that aroma and taste of a warm tortilla brought home from the tortillaria when the bag is still warm?
.
note about the chicken...i would suggest that you not try to save time or calories by using boned skinned breasts. your broth will be better and your chicken will be more moist with bone and skin on. to skim the fat i strained the broth through paper towel and it worked quite well, making this soup on the more healthy side. all good stuff.


CHICKEN POZOLE VERDE
with many thanks to Anya Von Bremzan and Food and Wine.

Ingredients
7 cups chicken stock or low-sodium broth
2 cups water
4 chicken breast halves on the bone, with skin
1 pound tomatillos, husked and halved
1 small onion, quartered
2 poblano chiles—cored, seeded and quartered
2 jalapeƱos, seeded and quartered
4 large garlic cloves, smashed
1/2 cup chopped cilantro
1 tablespoon oregano leaves
Salt and freshly ground black pepper
1 tablespoon vegetable oil
Three 15-ounce cans of hominy, drained
Finely shredded iceberg lettuce, sliced radishes, chopped onion, diced avocado, sour cream, tortilla chips and lime wedges, for serving

Directions
In a large, enameled cast-iron casserole, bring the chicken stock and water to a boil. Add the chicken breasts, skin side down, cover and simmer over very low heat until they’re tender and cooked through, about 25 minutes. Transfer the chicken breasts to a plate and shred the meat; discard the bones and skin. Skim any fat from the cooking liquid and reserve.
In a blender, combine the halved tomatillos with the quartered onion, poblanos and jalapeƱos, smashed garlic, chopped cilantro and oregano. Pulse until coarsely chopped, scraping down the side. With the machine on, add 1 cup of the cooking liquid and puree until smooth. Season the tomatillo puree with salt and pepper.
In a large deep skillet, heat the vegetable oil until shimmering. Add the tomatillo puree and cook over moderate heat, stirring occasionally, until the sauce turns a deep green, about 12 minutes.
Pour the green sauce into the cooking liquid in the casserole. Add the hominy and bring to a simmer over moderate heat. Add the shredded chicken to the stew, season with salt and pepper and cook just until heated through.

Serve the pozole in deep bowls, passing the lettuce, radishes, onion, avocado, sour cream, tortilla chips and lime wedges at the table.

this soup/stew keeps really well, and as any soup just deepens with flavors the next day. this can definitely be made ahead and enjoyed all week.

Friday, November 6, 2009

COLLARD GREENS AND BLACK EYED PEAS

these collards are the real deal, made with the simmering ham hocks and all. well, they're about as real as i know how being that i'm a girl who grew up in Newport Beach, CA. so now that i just admitted that, maybe they aren't so real after all, but the dish came out reeeeally tastey, and i can't wait to use those ugly ham hocks again...the rich smokey flavor is delicious and would lend itself to so many things. ya just don't get that same depth when you use just bacon. as you can see in the photo, i did use some bacon, but that was just because #1 i had some already cooked, and #2 because i thought it needed somemore meat action.

the broth...or liquor, as it's called, is a whole 'nuther story! i found myself slurpping up the last drops like a thirsty puppy. if you've ever worked with smoked ham hocks you know what i mean, but this was my first time. as a matter of fact, i just went to the market across town this morning to pick me up a few more of these babies. i can't wait to get started with them and try something new. i'm thinkin' some kind of smokey stew or thick rich soup.


the black eyed peas?...well, i did kinda cheat on those. i used canned, so the only one i cheated was myself. i think one of the main flavors of southern style beans is the slow soaking and cooking and infusing the flavor of the broth, or liquer, that they're cooked in...so, yes i did cheat myself out of that step. i wanted my collards that night and the beans should be properly soaked over night. i couldn't wait. i know you can put the said beans in a pot, bring to a boil and remove from heat and let sit for an hour or two, but still i went for the can...i didn't miss anything, but i bet they would have been just that much better. next time.

this is what i did for these...
COLLARD GREENS AND BLACK EYED PEAS
Southern-Style Collard GreensYields 8 servings
Collard greens are one of the oldest members of the cabbage family. This recipe is reminiscent of my mother's. She seemed to let her greens simmer away for hours! I make mine with ham hocks, which help tenderize the greens and add flavor, along with a little brown sugar to take away any bitterness. A lot of Southern families serve their greens with a side of bread to dip in the cooking broth, known as pot-likker. The broth is packed with vitamins and refers to the leftover "liquor" in the pot, after your greens have cooked. It not only tastes good — it's really good for you!
4 smoked ham hocks, 1 large onion, thinly sliced, 3 bay leaves, 4 pounds collard greens, Chicken stock or broth, or water, as needed, 1 tablespoon brown sugar, 2 teaspoons red pepper flakes, 1 teaspoon salt, 1 teaspoon freshly ground black pepper
1. Rinse the ham hocks and score the skin in several places. In a heavy 8- to 10-quart pot, combine the hocks, onion, and bay leaves with enough water to cover. Bring to a boil, reduce heat, cover, and simmer for 1 1/2 to 2 hours, until the hocks are falling apart.
2. Remove the ham hocks from the cooking liquid and reserve the meat, discarding the bones, skin, and fat. Strain the cooking liquid, skim off the fat (i like to use cheese cloth with a strainer because it seems to grab some of the fat as well as strain thouroughly), and return it to the pot.
3. While the ham hocks are cooking, remove the stems from the collard greens and roughly chop; set aside. i rolled the leaves together and made 1 inch slices. your preference i suppose.
4. Add enough chicken stock or water to the cooking liquid to make 6 cups. Add the chopped collard greens, brown sugar, red pepper flakes, salt, black pepper, and reserved ham. here is were i added the black eyed peas. Bring to a simmer over medium-low heat and cook for 45 minutes to 1 hour, until the greens are very tender. Serve immediately.

"immediately" is B's rule...i had no idea, being this was my first time with greens, how long this was going to take and i was done quite a bit early, so i ended up reheating and, of course, no harm no foul. i even think they were better and better each day they hung out in all the smokey ham hock goodness. i also added some precooked crispy bacon...for good measure. you know my rule...a little, or alot, of bacon never hurt anything....

Thursday, November 5, 2009

FRUIT SALAD IN NOVEMBER?

with all this talk about pumpkins, sweet potatoes, roasts and slow cookers let's not forget about our beautiful fruit...while it's still here..hangin' in there..getting VERY EXPENSIVE!

just yesterday i had to buy some blueberries...$4.99...YIKES!!!! and they were rather small and flavorless, i might add. honeydew melon was over $6 bucks...even good old strawberries are 4 bucks....errrrrg

i know, i know...apples are IN !...well.....apples are ALWAYS IN!!!
don't get me wrong. i love apples..have one just about every day, but in this house everyone expects a nice little fruit salad with lunch. specifically, a fruit salad prepared by ME. all through summer these fruit salads were unbeleivable. raspberries, blueberries, blackberries, strawberries, MANGO, papaya, peaches. ooooh there was sooo much to chose from, but now it's getting to be a bit hard to keep up with the expectations.

i thought all was lost 'till i sliced into this unasuming, hard to the touch, Tuscan Sweet melon this morning and thought i'd died and gone to fruit heaven. is this thing beautiful or what?!...the sweet aroma alone almost bowled me over. it was just the right crispiness. i prefere my melon on the semi crispy side, but quite often they haven't developed their flavors yet...this one was perfect. AND only about $2.50. the kiwis?..3 for a dollar...and i found raspberries on sale 2 baskets for $3.00. as i said i had to splerge on the blueberries. needless to say, fruit salads are still going strong in this house...what is everyone else doing for fruit? here in California we always have the variety, it just get soooo expensive. should i kill the fruit salad everyday ideas? i don't think that would fly.
for now i'll stick with the melons and what ever is on sale...this week i'm good and it's not bad for a fruit salad in November.

Tuesday, November 3, 2009

The UGLY Scary Halloween Candy GOOEY Brownie

so UGLY
so GOOEY
soooo GOOD
so FUN!
what do you do with all your leftover Halloween candy? besides sit around eating it one piece at a time untill you can feel the cavities drilling holes in your teeth? OR, do you find yourself waking from a sugar coma with malt balls stuck in your hair?
well, i thought i'd get rid of mine in one fell swoop...
gather up all the "unwanteds" (of course, i kept out the Reeses and the Heath Bars) and throw them in a brownie.

better yet..

for REAL effortless quick candy disposal...grab your favorite brownie mix...mine is Ghirardelli's Triple Chocolate

mix 1/2 of it in the dough

bake for just 12-15 minutes under the correct full cooking time

remove from oven and top with the other 1/2 plus some mini marshmallows never hurt

back in the oven for approx 12-15 minutes

let cool completely before cutting.


cutting them in neat little brownie size squares is kind of a difficult task, to say the least. mine got a bit to melted because i underestimated the brownie cooking time and the topping was in just a bit too long. it's all good...just made them uglier...

and we all know ugly can be a beautiful thing.

as you might guess, the topping is quite gooey, crispy, sticky and just plain ol' hard to cut through without smashing the brownie cake. it really depends on what kind of candies your throwing in.

mine was Malted Milk Balls, Candy Corn, Hershey's Cookies and Creme and the mini marshmallows. the marshmallows were a great add because they ended up getting a little toasty like a camp-fire treat. the candy corn melted and the milk balls deflated. the cookies and creme disappeared into the chocolate abyss.

i must say...i kinda threw this together as a joke. i thought if i pagage them with the "UGLY" disclaimer i could just say "i warned you" if they didn't go over to well, but i already got 3 rave reviews..."best thing ever". and "please slip me another one of those ugly things tomorrow if you have any left" and another said "it was "PUNK ROCK BAKING at it's best"

so...the Reeses and the Heath Bars are next up on the chopping block...

Sunday, November 1, 2009

Spicy Chicken Feet in a broth of liquid Gold

LIQUID GOLD...
the chicken feet might be an acquired taste, but the broth is all worth it.
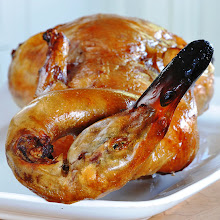
CHICKEN FEET !!???...
not for the faint of heart, but don't run away. a bit scary looking, but oooh sooo

finger lickin' good..? sorry, i had to say it.

ya see, chicken feet don't scare me. i remember my grandma eating them way back when they actually came with the chicken you were buying at the regular market. she would throw everything in the pot, feet, gizzards and all, but the feet were always hers when all was done (maybe because she didn't have to fight anyone for them?). does that make me sound old or what?!...back when i had to walk 10 miles in the cold rain in the early morn' just to get to school. yeah right...
needless to say...wasn't Grandma's chicken soup always THE BEST?...did ya ever think it could have been the FEET?...

anyway, you all know i love tot try the odd, the out of the ordinary, the ultimate UGLY foods, so i decided i had to find some chicken feet. not an easy task. once again i was told i would have to special order them and it would be a 5lb. min. 5lb's is a bit much for lil' ol' me. then i remembered the PIG FEET delima...same thing, BUT i found them at my favorite Mexican market, Northgate #9 in Santa Ana. a bit of drive, but well worth the trip. i always find great stuff there.

BINGO!...some nice fresh feet just waiting for me to experiment with.

this first time i thought i would just go basic, but with a little heat, of course.

WHAT TO DO
or this is what i did...
if you are not used to cleaning chicken feet, it can be quite tricky and i must admit, quite strange. first, you have to rub the feet with salt to clean them. i used Kosher salt. then rinse. put them in a large pot of boiling water and scald for 5 min. let them cool enough to handle. next, cut off the claws (this is kind of weird because you feel like you're cutting the tips of fingers off) and trim off the hardend unwanted spot normally seen beneath the feet. i should have taken a pic of this, but it's like a dogs' paw-pad?. you'll see it, just clip the hard part off with some scissors. then rinse. now the chicken feet are ready to be cooked in any way you want...

i had read in quite a few articles that the broth made with chicken feet is fab, so i wanted to start out like i was making a good basic broth. let me interject here that...

THE BROTH IS LIKE LIQUID CHICKEN GOLD!
aprox. 2 lbs chicken feet
water to cover about 1 inch.
the basics..onion, celery, carrot
(i used 1 or 2 1/4'd yellow onion, then added the chipolini onion later)
4-5 cloves garlic, smashed
1 bay leaf
1 tsp chili powder
1 tsp. cumin
1 tsp. cayenne
1 tsp oregano
1 tsp thyme
5 dried arbol chilis

these are approx. measures because my broth is a little different every time, but always similar flavors. just add pretty much whatever you want for your end result.
i was going for a more spicey Mexican flare rather than grandma's homestyle broth.
bring to a boil, then simmer for about 1 1/2 - 2 hours untill tender...ask me how tender?...i guessed. there were quite a few feet in there so i just kept checking on them. you want the cartilidge to get tender because that's mainly what you're after. i'll bet it was about 2 hours. when done to your liking strain. i like to strain though cheese cloth, it gets all the tiny what-nots and grabs some of the fat on the way through. put everything back together and you're ready to dig in...

now...eating these, what now resemble little hands, is a whole 'nuther story...i don't think there is a proper way or even a slight instruction on how you should eat these.
just put one in your mouth and start sucking...
they are quite tedious to eat, but alot of fun. i would definitely say don't eat these with anyone you're trying to impress or anywhere in public, for that matter.
JUST TRY 'EM....
if you can't deal, all is not lost....you'll be left with some incredible, always useful, rich golden broth that can be stored away for a rainy day...and it might stir up some fabulous old memories of your sweet Grandma, or at least someone's Grandma.

ps...check this out...actual HEALTH BENEFITS....the fountain of youth found in feet!!!
taken fron an article by Robert Reames
Chicken feet. This is one whose health benefits you may be unfamiliar with. As far as joint health goes, this is probably one of the most outstanding foods that you can eat. It is loaded with readily absorbable protein, collagen, calcium and cartilage to maintain, repair and build overall joint integrity. It's absolutely incredible for your skin as well. Kung Fu martial artists have used this for centuries to enhance overall joint integrity and strength. Could this be a fountain of youth? Healthy joints give you the mental and physical energy to be at your best for a lifetime.
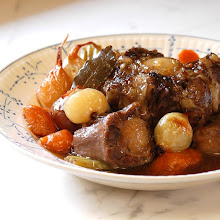
Related Posts Plugin for WordPress, Blogger...