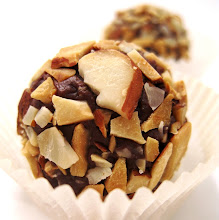
Showing posts with label sweets n' treats. Show all posts

Tuesday, August 9, 2011

Turkish Coffee Truffles


TRUFFLES...
pretty easy, a little messy...
fun to make and people are always AMAZED that you made such a "decadent candy".

truffles are definitely a great gift item and are sure to impress everyone.  something about them screams decadence...why?...i don't know.  it's just a ball of rich creamy expensive dark chocolate lightly coated in another layer of rich dark chocolate, lightly roasted nuts or something else wonderfully delicious...what could be so good about that ?...!

EVERYTHING IS GOOD ABOUT THAT !

everything is good about truffles...period!


this flavor combo reminds me of Turkish Coffee...i love Turkish Coffee...powerful stuff.  thick dark coffee, a hint of cardamom and sweetened with a big spoonful of raw sugar...YUM !  you have to know just the right moment to stop sipping or you get a mouthful of sludge.  did you know that there are people who know how to read your coffee (sludge) grounds?  it's just like the Chinese read tea leaves.  you turn your cup upside down on a napkin and your future could be discovered...  ive never had it done, but maybe i'll come across the opportunity sometime...i hope.


once you get the hang of it the flavor combinations are endless.
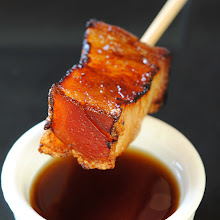
just a few weeks ago i made some i found from Giada De Larentiis for Dark Chocolate Balsamic Truffles...
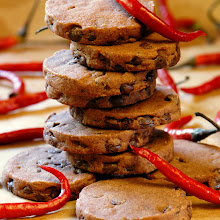
for  a healthy version try Chocolate Coconut Healthy Truffles

there IS a Truffle out there for everyone...


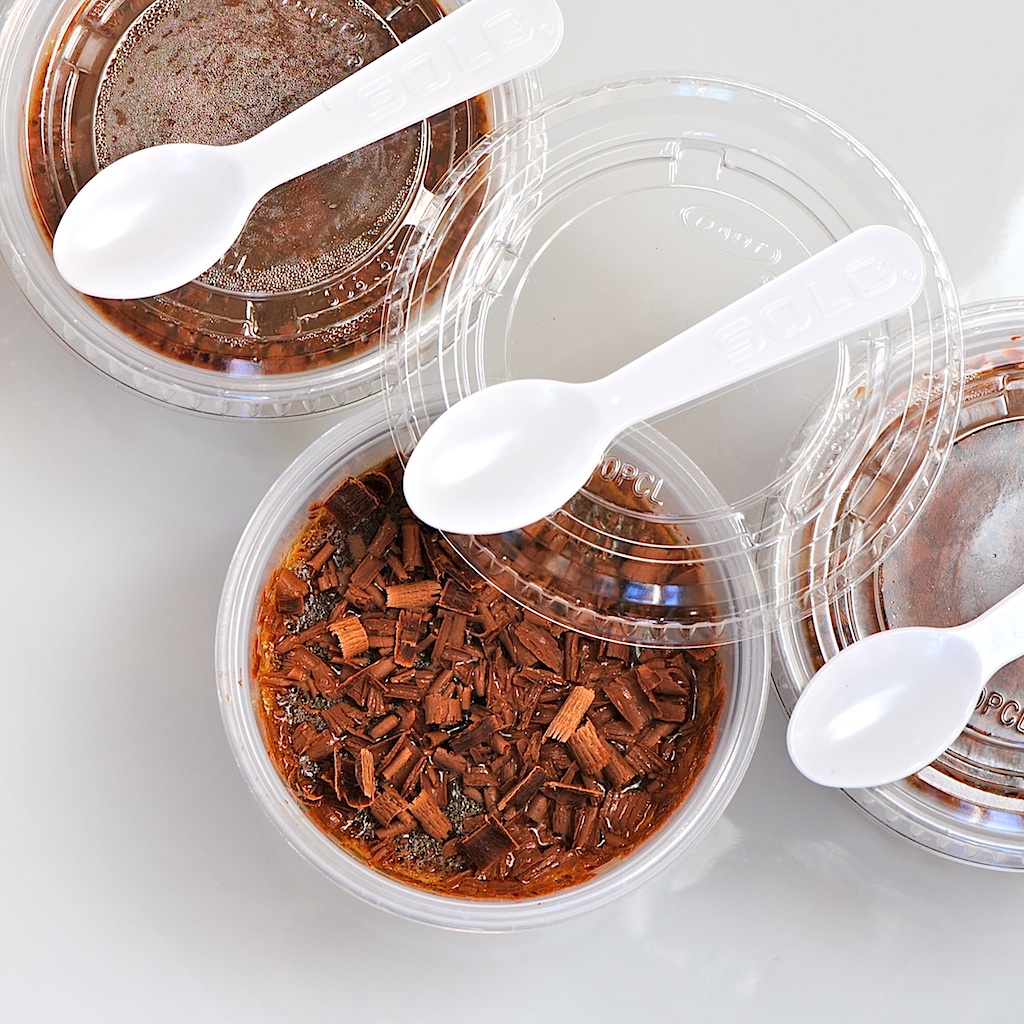
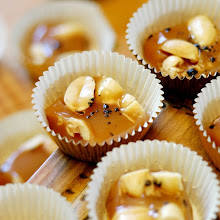
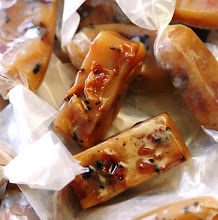
TURKISH COFFEE TRUFFLES

250 grams GOOD chocolate...i used 1 large bar of Valorona 61% 
1/2 cup heavy cream
10 smashed cardamom pods
1 star anise
1/2 rounded tsp instant espresso
1/2 tsp vanilla


put the cream into a small saucepan with the smashed cardamom pods and star anise over med heat and bring to almost boil...do not let boil. let this sit and steep to room temperature.
chop the chocolate in even small pieces
strain the pods from the cream,  add infused cream to chocolate and melt together in a double boiler, stirring until incorporated...no visible lumps
take off the heat and add vanilla extract, instant espresso and stir until incorporated.  taste test...i added just a small dash of ground cardamom because i didn't taste the cardamom enough(i only used 5 cardamom pods...it was my first time using pods)
pour this mixture into a smaller bowl and let cool just a bit before moving to fridge.
**most recipes say to chill in fridge for 1 hour, then remove and let sit out for 2 hours...
**NOTE...this did NOT work for me.  
i suggest you give this a try...let the chocolate cool to room temp, stir it up a bit (i recently saw a show where the chef beat the chocolate with a hand mixer for a minute or so before chilling in the fridge) then cover and chill in fridge for a few hours, or until completely firm.  then remove and let sit out over night..(it might be too hot during the day to set)

when it is easy to scoop...should be about like ice cream...make little balls and drop them in a dish filled with cocoa powder, chopped pistachios, toasted almonds or what ever you like.  gently roll them around to coat.  place them on a parchment or wax paper lined tray.  best to put them back into the fridge for a bit.  i like to do about 4-5 then put them in the fridge so they don't get a flat bottom while sitting out.   just remember to take them out and bring to room temperature before serving.


Tuesday, July 26, 2011

EASY PEACH PIE-CAKE


easy peezy Peach Pie-Cake.
this is a definite go-to recipe that can be whipped up in no time.  i always keep...HIDE...a can of pie filling in the back of the pantry just for this quick and easy cake.  when someone, anyone, comes to visit they always expect a little something sweet from the kitchen and this one never fails.

i know...i have a reputation to keep up and canned pie filling does NOT boost my ratings, but this is one of those
NO-BRAINER...ALWAYS WORKS...ALWAYS TASTY 
desserts that is worth standing in line at the market with canned pie filling in the basket.


it's a fabulous simple sweet treat that can be served as a dessert with ice cream or whipped cream, as a brunch side like a coffeecake with a little fresh fruit and ginger syrup...or i enjoyed it for breakfast with a little vanilla Greek yogurt

try any flavor filling...i must say that fresh fruit will not give the same outcome.  you kinda need that eewey gooey sweet filling that only comes in a can...and besides the can is what makes this so darn EASY.  so go out (to a market far far away) and buy a can of good ol' pie filling, quickly grab what ever flavor and dash home...no one will be the wiser...


EASY PEACH PIE-CAKE

1/2 cup unsalted butter, room temp.
1 cup AP flour
3/4 cup sugar
1 tsp baking powder
2 large eggs
1 tsp vanilla extract
12 1/2 ounces peach pie filling
powdered sugar to finish

preheat oven to 350 F degrees.  spray an 8 x8 baking pan with non stick spray...set aside

cream the butter and sugar together in a stand mixer or large bowl.  add the eggs one at a time, beating after each addition.  add the vanilla extract.  mix until well combined.  add flour and baking powder and mix until just combined.  the batter will be thick.

spread batter into pan.  it's OK if it's a little uneven because the pie filling will fill in those areas.  take pie filling and scatter all over the top of the batter.

bake for 30-40 minutes until golden brown, or toothpick test in the center.  try to toothpick test in a spot where there is no filling.

cool and dust with powdered sugar.

serve with fresh fruit, toasted pecans, ice cream, creme anglais, ginger syrup or just as-is.  keeps well for a few days covered....if there's any left over.


Sunday, April 24, 2011

Mocha 'spresso On-The-Go Jello


forget those 5 hour energy drinks that cost a fortune.  make yourself some Espresso jello cups for those inconvenient times you need a pick-me-up.


i love these things...my friends love these things...you will love these things.  i think i've already made about 5 batches and i'll make more tomorrow.


i got this idea from Nicole at The Galley Gourmet.  in the post titled "Sunday Dinner" she had this fabulous photo of Chocolate-layered Espresso Jellies.  her recipe sounds absolutely delicious and a perfect end to a fabulous Sunday Dinner.


i, on the other hand, don't throw too many lavish dinner parties...none, if truth be known, so i came up with this easy Mocha 'spresso On-The-Go idea.  how much fun would it be to whip an espresso shot out of your brown bag lunch?...or pass these out at your next tailgate party?  try this for an afternoon pick-me-up or an after dinner guilt-free treat.  these are pretty guilt-free...just a little shaved dark chocolate never hurt anyone.


MOCHA'SPRESSO JELLO TO GO

below are the instructions for the way i have been making it, but of course, there are many many variations.  have fun with it...

makes 4 1/2 cup servings
1 packet of plain gelatin (7g per packet)
1/4 cup cool water
3-4 shots of espresso (equal to 3/4 cup)...HOT-reheat if you have to
1 cup vanilla protein drink (milk would probably work, but the protein drink is creamier, extra flavor, less calorie and low carb...Muscle Milk or Pure Protein are good)
sweetener to taste
(a splash of no sugar Hazelnut or Irish Cream sweetener is great.  i use Davinci's)
dark chocolate bar for shavings

NOTE...whatever espresso/protein drink/milk/water combo you use your goal is to end up with 2 cups of liquid. this can be like a straight up espresso shot or a flavored latte.  you want the liquid to taste as you would a favorite coffee/espresso drink, but a little more rich.  most friends liked the one with a little more latte flavor, but the straight up espresso was brilliant, if ya ask me...

pour 1/4 cup cool liquid (milk, protein drink, water) into a 2 cup pyrex measure.  add the gelatin packet and let the gelatin bloom for about 5-10 minutes.  stir it so that it doesn't clump up.  if it clumps, use a fork or spoon to mash clumps...a few little clumps are okay.  
pour your hot espresso into this gelatin mixture and stir until the gelatin has completely dissolved.  do a taste test...is it sweet enough?...remember this is a treat.

shave a little chocolate into the vessel of choice.  i got these little toss aways at Smart and Final.  reusable tupperware would be more green of me, but i never get them back and people tend to throw those away. i reuse these as much as possible.

pour the mixture in the cups and refrigerate until firm...takes a few hours

shave some more chocolate on top and you're ready to go...ANYWHERE

A POWERFUL LITTLE PICK-ME-UP TREAT !


Friday, March 11, 2011

Apricot Almond Oat Bars


since my last post about the "Turkey Tails" was sooo long, i'll get through this one quickly.

i found this recipe while watching some Giada De Laurentiis show in the wee hours of the morning.  while half asleep i heard "healthy" and i heard "oatmeal".  two things i'm always looking for in a good morning snack.  well, i would NOT really consider this a "HEALTHY" recipe with a cup of butter and a cup of brown sugar, but they DO have a good amount of oats, almonds and i used whole wheat white flour...so all is not too too bad...some people would actually call this a "health bar".

the photo above was taken about an hour after baking...yummy, sweet jam gooey-ness with the crunch from the almonds, but kind of squish when you cut them into bars...even with a very sharp knife.

the photo below was taken after refrigerating to set.  i find this makes for cleaner cutting when they are chilled

APRICOT ALMOND OAT BARS
for original check the link.  i made just a few changes that worked quite well.

FILLING
1 13 oz jar apricot jam...i used Bonne Maman Apricot Preserves
8 10 dried apricots diced into 1/4 inch pieces (about 1/3 cup)

CRUST
1 3/4 cup whole wheat white flour
1 cup packed brown sugar
1 tsp cinnamon
1/4 tsp cardamon
a few grates of fresh nutmeg.  maybe a little less than 1/4 tsp
3/4 tsp sea salt
3/4 tsp baking soda
1 3/4 cups old fashioned oats
1 cup coarsely chopped almonds
1 cup unsalted butter...melted
1 egg room temperature...beaten
1 tsp vanilla extract

preheat oven to 350 F.  spray or lightly butter a 9 x 13 inch metal baking pan and line the bottom and sides with parchment so it over hangs on 2 sides for easy removal

in a small bowl mix together the jam and the diced apricots.  set aside.

for the crust...in a large bowl (i did this in my electric mixer.  whisk or paddle works well) mix  together the flour, sugar, cinnamon, cardamom, nutmeg, salt and baking soda.  stir in the oats and the almonds.  add melted butter, egg, and vanilla.  mix until incorporated.

using a fork or clean fingers, lightly press 1/2 dough mixture into the bottom of prepared pan.  try to make it so there are no holes.  using a spatula, spread the filling over the crust, leaving 1/2 inch border around the edge of the pan.  cover the filling with the other 1/2 dough mixture and gently press to flatten.

bake until light golden brown, about 30-35 minutes.  cool for about 1 hour.  cut into bars and store in airtight container or refrigerate.
NOTE...as i stated above, i like to refrigerate to set them a little before cutting.  this makes for a nice clean cut and they don't squish down and get all messy.


OH...WOOPS!  did i forget to say these are DELICIOUS !!!


Friday, February 18, 2011

Hazelnut Sugar Cookies


don't ya just hate it when something comes out of the oven you think it's all gone wrong?
well, that was the case with these...BUT...

THEY TURNED OUT FABULOUS!

my intention was a cookie with the look and texture of a snickerdoodle and the yummy taste of roasted hazelnuts. (i needed to use up some of the boatload of roasted hazelnuts i had from some other recipe i was working on.)  as you can see in the photos, the snickerdoodle effect did not take place.  they did not rise and fall with that fabulous earthquake looking crack on the top.  

i thought they were all wrong!  until first bite...YUM!
so this one turned out great...BUT all cookies are great right when they come out of the oven... 

will they stand the test of time?...YES...they were still delicious even a few days later.
sometimes, most of the time, i don't get to hand out my goodies until a day or two later.  they have to cool...get some sort of icing or decor...then off to the photo shoot...then they get packaged up and passed out.  quite often this does not all happen in a day.  i get side-tracked with something savory...things are flyin' all over my kitchen sometimes...you know how it is...


the photo below is from the first  tray that went in.  i did not flatten the cookie.  like a snickerdoodle i thought it would flatten and spread during cooking...when it didn't, i thought i had a failure on my hands.    this one was actually the funnest one to eat. 
 i dubbed it "THE HAZELNUT BOMB"
the very top photo is from the second tray that i flattened with the bottom of a glass.  this made for a larger looking cookie with a little more crunch.  both were fabulous and loved by all.  i think i still have some hazelnuts to use up so maybe anther batch will be in store for this weekend.

something is always a winner in this house when it gets made more than once.


ok...on with the recipe...

HAZELNUT SUGAR COOKIES...

1/2 cup butter, softened
1/2 cup shortening
1 1/2 cup sugar
2 eggs
2 tsp vanilla extract
2 3/4 cups white whole wheat flour
2 tsp cream of tartar
1 tsp baking soda
1/4 tsp salt
optional...1/4-1/2 tsp cinnamon and 1/4 tsp fresh grated nutmeg
(i like to put a sprinkle of spice into most everything)
3/4 cup roasted lightly salted hazelnuts, chopped fine
2 Tbsp white sugar
3-4 Tbsp raw sugar (or something like in photo)

preheat oven to 400 F
cream together butter, shortening and 1 1/2 cup sugar.  then add the eggs one at a time and the vanilla.  mix well.
in a separate bowl mix the flour, salt, baking soda and cream of tartar
add dry ingredients to wet.  mix until just combined
add hazelnuts 'til just combined

in a small bowl mix the white sugar and the raw...set aside
shape dough by rounded spoonfuls into rounded walnut size balls
roll in sugar mixture and place on parchment lined cookie sheet
NOTE...you can choose to flatten them or not.  i suggest trying both.  i have photos of flattened and not flattened.  they are both fabulous
bake for 8-10 minutes depending on how large you make them.  bake until set, but not hard.  remove from baking sheet immediately.  i like to slide the parchment right onto my counter top, but that's me.

FOR THE ICING
mix this all together well in a small bowl.  a spoon works fine.  put it in a thick baggie and cut off the tip for an easy quick piping bag.  PS...don't cut your tip too big.

1 cup powdered sugar
1 Tbsp milk
2 tsp corn syrup
1/4-1/2 tsp vanilla extract
a sprinkle of cinnamon
a few grates of fresh nutmeg


Monday, September 6, 2010

Lemon Poppy Protein Cake

this little unassuming cake is not just your usual lemon poppy seed cake. not only is it light and moist and delicious..it's THE BEST "protein cake" recipe i have come across as of yet...and i must say i have tried quite a few...bars, puddings, cupcakes, cookies, cakes, etc...ALOT! most cakes using protein powders come out dry or mealy or just plain awful, but this one is surprisingly good. friends i tested it on asked for the recipe...doubt they'll ever make it themselves, but nice to know they wanted it again.
if you're looking for something a little more healthy to start your day, a nice afternoon pick-me-up snack or a great light after dinner treat this is definitely worth the try. i used a 9 x 13 dark pan with parchment and made 16 servings. the approx. nutritional count (per 1/16th serving) 85 calories...8g protein...7.5 g carb...and a couple grams o' good fat from the coconut oil.
LEMON POPPY SEED PROTEIN CAKE
adapted from askGeorgie.com ...original recipe found here

• Cooking oil spray
• 1 1/3 cups white whole wheat flour (or gluten free flour)
i subbed in 1/3 cup almond flour
• 2 scoops vanilla whey protein powder
• 1 cup Splenda granulated or 2/3 cup sugar
• 2 tablespoons poppy seeds
• 2 teaspoons baking powder
• ½ teaspoon baking soda
• ½ teaspoon salt
• 2 teaspoons lemon zest
• 1½ cups nonfat plain Greek yogurt
• ¾ cup unsweetened applesauce
• 1 tablespoon canola or macadamia nut oil...coconut oil
• 2 ½ teaspoons lemon extract
• 2 eggs...i used EGGBEATERS

1. Preheat oven to 325°F. Coat a 9×13″ pan thoroughly with cooking oil spray.
2. In a large mixing bowl, combine flour, whey, Splenda, poppy seeds, baking powder, baking soda, salt, and zest; stir to mix.
3. In a separate large mixing bowl, stir together yogurt, applesauce, oil, lemon extract, and egg. Add dry ingredients to wet ones, and stir just until uniformly moistened. Pour batter into pan.
4. Bake 25 minutes or until toothpick inserted in center comes out clean. Do not over bake. Cool 5 minutes before slicing. To keep moist, wrap each bar in plastic wrap and store in refrigerator or freezer. Microwave briefly to reheat.
this saves very well. i kept it in the fridge for a few days and it was great, although it's SUPER good and moist the day of....isn't everything?

Monday, August 23, 2010

Pineapple Ginger Ale Cupcakes

PINEAPPLE GINGER ALE CUPCAKES
soooooooo easy, low fat, waist friendly, and quite delicious. i can't believe i haven't run across this recipe before. i'm always on the war path for things that aren't full sugar-full fat and these fit the bill. so easy and fast, i've already made them 2x's and i would have some in the oven right now, but BIG AL is baking a Pineapple Upside Down Cake...i don't know...all the sudden he felt like making his own cake...uh oh...could that be a subtle hint?...good?..or bad? i must admit, i haven't been baking much lately...i'm more into savory right now. the poor guy used to get a new fancy dessert every night. now sometimes he gets ice cream and...shhhhhh...store-bought cookies. trust me...i feel the shame. i have to get my baking boots back on. this was a simple start.

a great find..besides being one of those "this-isn't-gonna-work" recipes, it's fun to make and it's kid friendly...did i mention it's fairly waist friendly as well? low fat with no added oil and egg whites only. so fast to whip up and, like i said, a no-brainer.

i know it's from a box, BUT the fun is in the flavor combos. so far i've made these Pineapple Ginger Ale Cupcakes topped with crystallized ginger, freeze dried pineapple and a classic vanilla butter cream frosting. also, not shown, was a butter cake and diet cream soda with toasted pecans...a little maple glaze might have been great, but i was keeping it a little lo-cal for my pals.


DIET SODA CUPCAKE/CAKE
i think the recipe came from Weight Watchers, but i found this one at Food.com

1 box cake mix...i chose pineapple cake mix
10 oz. diet soda...ginger ale was a great choice
2 lg. egg whites...slightly beaten
1/2 cup toasted nuts or dried fruit or coconut etc.......optional
frosting and toppings optional...great on thier own.

preheat oven according to mix
prepare cupcake tin or 9x13 pan (lightly spray or oil). i don't think cupcake papers will work well with this...use a tin or silicon cups.
blend all ingredients well-no lumps
bake according to box-mix or when tooth pick comes out clean
let cool completely before topping.

Suggested Combinations from recipe at Food.com: yellow cake mix / diet lemon-lime soda (with a dollop of Cool Whip -- tastes like a "Twinkie") , orange cake / diet Mountain Dew , cherry chip cake / diet cream soda , diet lemon-lime soda / lemon cake , angel or yellow cake / diet orange , white cake / diet peach soda , spice cake / diet lemon-lime , diet ginger ale / white cake , diet cherry soda / chocolate cake , Diet cola / devils food or chocolate mix , diet vanilla coke / chocolate cake , devils food cake / diet Vanilla coke , diet root beer / chocolate cake , diet cherry coke / chocolate cake , marble cake / diet cream soda , lemon cake / tangerine Diet Rite

Saturday, July 24, 2010

Caveman Carrot Cake Cookies

CAVEMAN CARROT CAKE COOKIES

well, first i give many props to SOG-Son of Grok...a fellow blogger that i believe, came up with this interesting recipe for a healthy, satisfying cookie.
these really are PRIMAL and definitely something a caveman would and could munch on for a tasty treat. the recipe was so easy, healthy looking and actually so weird...no flour, no butter and no sugar...that it intrigued me enough to run to the market and buy the little stubby mini carrots, dive into the pantry for the rest of the ingredients and make them right away. i'm always looking for something healthy to balance out all the pork fat i've been consuming and this seemed to fit the bill.

these are kind of a "what you see is what you get" kind of a cookie. the main ingredients are carrots, almonds, and coconut...no guess work on the flavor profile there, but you'll be surprised how they actually DO taste like a carrot cake...well, the first bite does, then you find yourself munching mainly on almonds and semi raw carrots with a hint of coconut which isn't a bad thing at all...and...no after treat guilt that's for sure. nothin' but good for ya in these chunky little patties.

a little warning to the real cookie lovers out there...these are not like any real carrot cake cookie you might expect. think HEALTHY, think RAW, think AGAIN if you're looking for a delicious treat with cream cheese frosting.

CAVEMAN CARROT CAKE COOKIES
i just added a few more spices. next time i might play around with a little almond flour, a little more spice, more sweet and maybe grated carrots.

Ingredients:
2 cups mini carrots
2 cups raw almonds (might try roasted...)
1 cup shredded sweetened coconut
1/2 teaspoon nutmeg
1/2 tsp cinnamon
1/4 tsp ginger
1 1/2 teaspoon vanilla.
1 1/2 Tsp splenda (could use more)
2 teaspoon Coconut Oil
- 3 eggs

Directions:
1. Combine all ingredients except eggs in food processor. Pulse until small but a little chunky. use your judgement. i wonder if the carrots should be shredded before going in the processor?
2. Combine mixture with eggs in a large mixing bowl.
3. Form into “patties”. this can be a little messy. just make them like you would a hamburger patty and flatten them. they, of course, WILL NOT RISE. place on a baking sheet. I made 14 with this batch.
4. Bake at 350 degrees until done. Mine took about 40 minutes.
5. Enjoy!

Saturday, June 26, 2010

Sticky Fig Cupcakes with Brown Sugar Glaze

these little/big sticky figgy moist cupcakes are a winner. my ever so cute and fabulous next door neighbor, Wendy, asked if she could borrow our large cupcake tin...little did we know that we would get a sample of this incredible recipe she was testing. she's quite the baker and everything she's brought over is killer good. for my birthday she made some triple chocolate brownie cookies that were gone so fast i couldn't get a picture of them. i wanted to post the recipe with photo, but i guess i'll have to make them myself. the problem would be having them in the house. the whole recipe might just send me over the edge...they were THAT GOOD ! anyway, these cakes are awesome and the subtle crunch from the figs just adds that extra little...hmmm...something...something yummy. served a little warm with fresh whipped cream and oozing brown sugar glaze it's pure heaven.


STICKY FIG CUPCAKES with BROWN SUGAR GLAZE

i copied this recipe from the xerox my neighbor Wendy was kind enough to pass along. i didn't get to ask her where it's from so BIG thanks to the original baker out there somewhere.

makes 6 extra large cupcakes

SAUCE
2 Tbsp.unsalted butter
1/2 cup heavy whipping cream
2/3 cup brown sugar
1 tsp vanilla

CUPCAKES
1 cup water
1 cup (about 4 oz.) dried figs quartered
1 1/4 cup unbleached flour
1 tsp baking powder
1/2 tsp baking soda
1/4 tsp salt
1/4 cup unsalted butter. room temp.
3/4 cup sugar
2 large eggs
1 tsp grated lemon zest
1 tsp vanilla
heavy whipping cream for serving

make the sauce. in a med. sauce pan, heat the butter, cream and brown sugar over med. heat, stirring often, until the butter melts and the brown sugar dissolves. increase the heat to med. high, bring to a boil and boil for 1 minute, stirring constantly. remove from heat and stir in the vanilla. set aside.
make the cupcakes. position the rack in the middle of the oven. preheat to 350F degrees. line tin with liners or Wendy used a non-stick tin. if using liners, spray the inside with non stick cooking spray.

put the water and the figs in a small sauce pan and bring to a boil: set aside to cool while you prepare the batter.

sift the flour, baking powder, baking soda and salt into a medium bowl and set aside. in a large bowl, using an electric mixer on medium speed, beat the butter and sugar until blended and creamy, about 2 minutes. stop the mixer and scape the sides of the bowl as needed during mixing. add the eggs, lemon zest and vanilla, mixing until smooth and thick. you may see a few small pieces of butter which is fine. on low speed, mix in the flour mixture to incorporate it. mix in the figs, with the liquid that remains in the pan.

fill tin with 1/2 cup batter, to about 1/2 inch below the top of the cupcake tin (or liner if using). bake in 350F degree oven. bake until tops feel firm and a toothpick inserted in the center comes out wet, about 20 minutes. remove from oven and reduce the oven to 225F degrees.

spoon 1/2 Tbsp. brown sugar sauce on top of each cupcake. the cakes will have risen to the top of the liners/tin, so some sauce may drip down the sides onto the pan. return the cupcakes to the oven and bake until toothpick inserted in the center comes out dry, about 20 minutes. cool the cupcakes on a wire rack for 10 minutes.

carefully place a wire rack on top of the cupcakes in their pan. protecting your hands with pot holders and holding the pan and rack together, invert them to release the cupcakes onto the wire rack and turn the cupcakes top side up. if any sauce remains in the bottom of the tin, spoon it over the cupcakes. let cool completely.

so serve the cupcakes, warm the remaining sauce over low heat. remove the paper liners and place each cake on a plate. pass a little pitcher of the warm sauce and some warm or whipped cream.

the cupcakes can be covered at room temp for up to 3 days. the sauce can be made ahead, covered, and refrigerated for up to 5 days. warm before baking the cupcakes.


Thursday, June 10, 2010

Bestest Moistiest Apple Cake

BESTEST MOISTIEST APPLE CAKE...
this is one of the BEST Apple Cakes i have ever tasted. the best for a few reasons beyond just fabulous flavor and texture...my MOM baked it and she discovered it from a fellow blogger at Food Tale. Mom and i are just a little nutty about food. i love that she is a foodie like me...or rather, i'm a foodie like her. we live eat breathe and dream of food...well, i can't speak for her, but all i know is we discuss what's for dinner before anything else happens in the morning. sometimes we'll discuss the next dinner WHILE eating dinner...one could say...the apple doesn't fall far from the tree...oh come on...i had to say it. needless to say i was very proud of her web surfing and finding this beautiful delicious cake...it's earned it's place in the go-to pile for winners. by the way...this makes for an awesome breakfast treat and would make quite an impression for Sunday brunch.

this recipe comes from FOOD TALE and she adapted it from COOK EAT LOVE
many thanks to these 2 fellow bloggers for sharing this recipe.

unlike myself, Mom followed the recipe to a T so i have copied the recipe below for convenience, but please visit the original bloggers to enjoy their comments as well.

Moistest Apple Cake Recipe

•1 1/4 cups sugar (DIVIDED 1 and 1/4 cups)- original recipe was 1 1/2 and 1/4 cups
•1/2 cup vegetable oil/butter
•1 tsp vanilla
•200 gm cream cheese
•2 large eggs (Food Tale used Egg Replacer)
•1 1/2 cup flour
•1 1/2 tsp baking powder
•1/4 tsp salt
•2 tsp cinnamon
•3 cups chopped peeled apples (Food Tale used red apples)***

***note...the original recipe called for Granny Smith so that's what Mom used. i think they made the cake. Grannies are always crisp, tart and reliable

1.preheat oven to 175 degree C and spray 9 inch spring-form pan with cooking spray (or lining with baking paper)
2.Beat 1 c sugar, oil/butter, vanilla and cream cheese until well blended. Add eggs 1 at a time and beat until blended after each. Combine flour, baking powder, and salt. Add dry to creamed mixture and beat on low til blended.
3.Combine 1/4 cup sugar and cinnamon (to be honest you can use a little less). Combine 2TBSP of cinnamon mixture to apples and mix to coat. Stir apple mixture into batter. Pour batter (it is THICK) into a 9 inch spring form and sprinkle with remaining cinnamon mix.
4.Bake for 1 hour 15 minutes or until cake pulls away from pan at sides or a toothpick comes out clean. Don’t be afraid-it takes a long time to bake, maybe even longer than written. If it gets too brown cover it loosely with foil.
5.This is under dessert but it is the best breakfast ever. Make muffins too.

Thursday, May 13, 2010

CHOCOLATE TOFFEE PECAN BARS ...sooo easy

these little squares are a must. SOOOooo GOOD ! so easy, so quick, no mess, not even a mixing bowl. you must try them at least once. i must warn you now...if you are one of those who refuses to use ready-made helpers...then look away now. if you are one of those "I NEVER !... " type people...then look away now. if, on the other hand, you are ...way too busy cooking real food...in a hurry...or just plain lazy...you must try this recipe. personally, i'm up for anything that tastes good and makes people love you.

made with only a few ingredients that you probably already have...well...maybe not the scary cookie dough sausage...you might have to run out with a disguise to a market where no one knows you and purchase the... shhhhh....ready-made dough. oh, come on...i'm proud to call the Pillsbury Dough Boy my friend and you will be to after trying this EASY bar recipe. so many different possibilities. change it up with some different flavor combos. i haven't had time to get back to the many ideas i have. i know peanuts and peanut butter has to be worked in somewhere...and i have a big bag of macadamias waiting for something with a little white chocolate...maybe tomorrow.


let's get on with the recipe
many many thanks to Amy at VERYCULINARY.com
Amy's original recipe is found here. i have copied it below for convenience and added notes in bold italics...just a few additions.

PRALINE CRUNCH BARS
makes approx. 20 bars (depending on who's cutting them)
prep-5 min.
total time 1 hour-ish


INGREDIENTS

1 (18 oz) roll refrigerated sugar cookie dough

1/2 cup toffee pieces

1/2 cup finely chopped pecans

1 (12 oz.) bag of miniature semi-sweet chocolate chips. i used milk choc. chips

1/3 cup toffee pieces..i must have used 1/2 cup total on top

1/2 cup rough copped pecans on top as well.


DIRECTIONS

preheat oven to 350 degrees

place cookie dough, 1/2 cup toffee pieces and 1/2 cup finely chopped pecans in a large resealable bag. knead well to combine. press dough evenly into the bottom of an ungreased 9 x 13 baking pan

bake for 12 to 15 minutes or until golden brown. sprinkle with chocolate pieces immediately after removing from oven...let stand for about 5 minutes or until chocolate has softened and melted...spread over bars and sprinkle with the 1/3-1/2 cup toffee pieces and 1/2 cup chopped nuts.

chill in freezer or fridge until the chocolate sets. cut into bars.

Friday, April 23, 2010

Pumpkin Almond Butter Cake/Brownies

here we go with another one of those...

"i don't believe this is gonna work" recipes...

one look at the ingredients and you'd have to agree with me. it all sounds too gooey. i watched in shock and awe as it slowly became an actual cake.

as you can see, the first cake photo shown above looks a bit different than the second. i liked it so much the first time i had to try it again, but i had to try the true recipe. i fudged the ingredients the first time because i was in such disbelief that the goop in the mixing bowl was going to actually bake into something. the first batch i thought i just HAD to add some extra baking powder...as you can see, it DID come out quite a bit more cakey than the second batch. the second was by the book and turned out much more like a brownie. i think i like them both equally.


i was so excited to make this one i ran out to Whole Foods and bought some fresh ground almond butter. i had seen it there the last visit and i knew this recipe would make the long trek out there all worth it. i was right. i do suggest using fresh almond butter if you can get it. the almond butter used in the second batch was fresh, but a bit more loose than the first cake. i'm sure whatever you use will work out fine because the flavor of this cake is what it's all about. speaking of flavor...i thought the original needed a bit of cinnamon and, of course, a little kick from cayenne. i'm wondering if you might try a little cocoa powder? or go the pumpkin spice route?...whatever you choose, it does need a little something.

ALMOND BUTTER PUMPKIN BROWNIES
many thanks to Shelley at Primal Life. original found here and copied below with my notes.

Feel free to get creative with substitutions. Try other nut butters, other forms of squash, other sweeteners, spices, mix-ins, the possibilities are endless. I made several batches using either fresh squash that I steamed and mashed or canned pumpkin. I preferred the fresh squash to the canned pumpkin, but the latter worked perfectly well. Consider topping with applesauce and/or whipped cream for a delicious dessert.

Ingredients:

1 cup almond butter

¾ cup mashed pumpkin or other squash, canned or steamed

1 egg

1/3 cup honey

1 tsp baking soda

for my first batch (the cakey version shown) i used 1 1/2 tsp baking soda and added 1 egg white along with the whole egg.

Combine all ingredients in a bowl. Mix well. Pour into a greased 8 x 8 in pan. Bake at 350 degrees for 25 minutes or until a toothpick inserted comes out clean.

Tuesday, March 23, 2010

Custard Pie...with Sour Cream?...Too easy

yet another recipe i didn't believe would work. another one of those crazy sounding things i just HAD to try because my curiosity gets the best of me. so few ingredients and all that sour cream just didn't seem right. well, as you can see, it worked. i was impressed and so were my lab rats.....alot of the time, i feel like i have to put a lab coat and safety gear on when i'm in the kitchen because i have no idea what i'm doing, don't know what i'm creating and how it's going to taste. lucky for me, i have a pretty adventurous family and alot of willing, or at least,understanding friends. i must say, they are all a bit more adventurous with the sweet goodies and oooh sooo skeptical of my savory concoctions.
so about this dessert...i wouldn't call it a pie as the recipe says. i don't know what to call it. it was almost like a clafoutis, kind of like a custard, kind of like...hmmm...i don't exactly know, but you should try it. it was definitely like a good old school comfort food type of dessert. the big dessert eater in the family really liked it...finished the whole thing himself come to think of it. i thought it was quite tasty and i will probably end up making it again. it's simple, few ingredients and an extremely quick-prep treat.


since the success of the peach dessert i've made 2 more. this one pictured left was made with canned plums. i love whipping this quick dessert up for my custard lovin' dad. he can finish the whole thing in 2 days. that being said, it does keep for a few days in the fridge. it might lose it's sugary crunch top, but everything else stays tight. as a matter of fact, these slice pictures of the plum pie were taken second day.


personally i thought the pie plate version was just a bit thin. it makes for a more delicate looking dessert, but next time i think i'll try a smaller pie plate or stretch the recipe by about 1/4-1/2. it looks a little wimpy. i bet it would also work well in individual ramikins or something cute like that.


you can see the lovely sugary, crunchy texture that it has out of the oven, or day of baking.


the peach version was a little more impressive, because of the nice plump colorful peach halves. i think this would be fun served in individual ramikins. it might be fun to make for a brunch and play off the baked egg look. hmmmm, i think i might try that. i love dessert for breakfast.


EASIEST PEACH (pie?) CUSTARD DESSERT

i just don't know what to call it, but it's NOT pie...and you can use any other fruits (i think canned works best...or cooked)
many thanks to Food Tales for this odd, but nice, simple comfort food dessert
original found HERE at Food Tales with my notes on bold.

1 big can of peach halves (i don’t remember the amount, I’ll check it later)
1 cup sugar...i used 1/2 cup sugar and 1/4 cup splenda-the splenda went into the batter with 1/4 cup sugar, then i used REAL sugar for the top.
1 tsp vanilla or almond extract
cinnamon and nutmeg to taste is optional
5 tablespoon normal flour
200 gram light sour cream
Arrange the fruit in your ovenproof baking plate-dish.
In a big bowl, mix sour cream, 3/4 cup sugar and flour. Don’t have to use electric mixer.
Pour the mixture on top of the sour cream. Finally sprinkle 1/4 cup of the balance sugar on top.
Bake at 170 degree C for about 40 minutes or until the surface gets brown/golden.
You can have it warm or cold with vanilla ice cream, caramel sauce or chocolate sauce.

Related Posts Plugin for WordPress, Blogger...