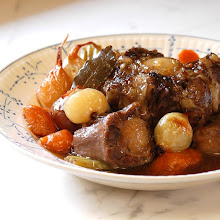
Caldo de Camaron Seco
what a fabulous soup i have found!
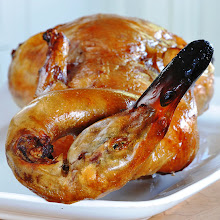
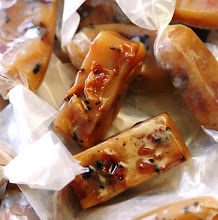
it was pretty much be accident...as are many of the "out of the ordinary" things i come across. last week i was shopping at my favorite Mexican market, Northgate in Santa Ana, to get the correct/authentic caramel sauce for my Flan Cake. i needed Cajeta de Leche as the recipe called for. just in case you missed the post on "The Flailed Flan Cake" here's the link...so sad...so very sad...
anyway.....as i entered the market the impulse buys caught my eye (i'm a sucker). they had a large display with these packaged up dried shrimp. i had seen them many times before here and Asian markets. "i wonder what the heck you do with these?" i asked myself. i thought they must be some Mexican treat or for some fabulous special occasion recipe if they have them all out on display...
they're ugly salty dried up old shrimp...i HAVE to buy them...i'll find out what to do with them later.

well, as far as i'm concerned...I HIT PAY DIRT!
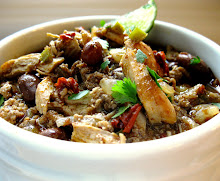
these ugly pale shriveled up little critters make the most incredible broth for this soup. i can't describe the flavor, but it's FABULOUS. the shrimp add a whole new layer that makes it taste rich and deep and totally authentic Mexican. a friend said she was transported back to her vacation in Puerto Vallarta. i'll take that as a compliment...thank you very much.

the recipe is fairly easy, but just a little time consuming. the shrimp need a pre-soak, a little broth time and then you have to remove the head, legs and tails off of EVERY single little shrimp that goes in the pot, but it's well worth it. you also have to make a real Mexican Red Sauce that requires steeping, pureeing, straining and sauteing the chills...again...well worth it. i make red sauce all the time...it's not that big of a deal. it's great for so many things...pork, chicken, turkey, beef etc...the Red Sauce recipe and instructions i use are found HERE, but i always add a few extras like cumin, oregano, 2-3 adobo chiles and adobo sauce.

i found this delicious soup recipe by googling "what to do with dried shrimp, Mexican". i thought about going with an Asian recipe, but i was in the Mexican mood...you know the Flan Cake and all...it was going to be a Fiesta!...
the soup?...incredible !
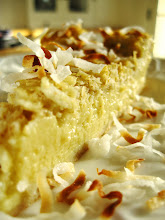
the flan cake?...don't ask...
CALDO de CAMARON
adapted from Pati's Mexican Table
i made a few changes, so please check the link for the original and her comments...she has loads of great Mexican goodies
1/2 pound of Mexican dried shrimp
2-3 oz dried Guaillo chiles...i also used a few New Mexico Chilies
1 Tbsp Mexican oregano
1 ripe tomato, diced
3 garlic cloves
2 bay leaves
1/2 small onion, roughly chopped
1 tsp cumin
1/2 tsp cayenne...optional
3 carrots, sliced
1-2 diced potatoes are supposed to be added, but i chose other veggies...
2 celery stalks sliced
a handful of green beans
1/2 head small cauliflower
1 more tomato, diced
1/2 onion, sauteed...(this was a good addition)
1 jalapeno, sliced or diced...optional
2 Tbsp oil
limes and cilantro for garnish
FOR THE SHRIMP
cover the shrimp with cold water and let them sit for 10-15 minutes. drain the shrimp, rinse them and place them in a medium pot. cover the shrimp with 5 cups of water and bring to a simmer over med. high heat, then turn down to a slow simmer for 10 minutes. strain the broth reserving both the broth and the shrimp. allow to cool.
once the shrimp have cooled remove the heads, tails and legs. Pati (original recipe blogger) suggests you keep the body shell on to add a little crunch to the soup, so that's what i did.
FOR THE RED SAUCE...
remove the stems and seeds from the chiles and place them on a hot "comal". i do not own a "comal" so a hot skillet works just fine. toast lightly until they change color a bit...jus about 10-15 seconds per side.
place the chiles, tomatoes, garlic, onion, oregano, cumin, cayenne in a saucepan and cover with water. bring to almost boil and turn down to a slow simmer for 15 minutes. get your stick blender out and puree until smooth...or use your regular blender or processor...i highly recommend getting a stick blender!
over medium heat add 2 Tbsp oil (olive is good) to a large soup pot. strain the chili puree over the oil.
NOTE...use a regular strainer and push all the goodness through. you should have just the tough bits left in the strainer.
add your cumin and cayenne if using. simmer the sauce for 10 minutes over medium heat allowing the sauce to season and thicken.
FOR THE FINISHED SOUP
add the shrimp, broth, carrots, green beans, jalapeno, 1/2 sauteed onion to the chili puree and let simmer for 10-15 minutes until carrots are tender...also add in the cauliflower towards the end because you don't want it to fall apart.
serve the soup with wedges of lime, chopped cilantro and some fresh diced jalapeno.
this is great as is, but also fabulous over rice...or add a few more veggies of your choice. i like my soups thick with goodies. the original only called for carrots and potatoes, but i wanted to add a bit more...maybe not as authentic, but good and good for ya.