Showing posts with label vegetarian. Show all posts

Friday, November 11, 2011

Baby Bella, Shiitake Mushroom Soup...(non dairy)


move over pumpkin...there's a fungi in town...
(sorry, i get carried away.  i'll just stop there with the bad puns)

but really...isn't everybody talking about pumpkin or butternut squash soup for the holiday?...

how predictable...change things up a little.


this creamy unctuous soup is so delicious.  rich deep flavors but very light on the palette.
no cream and very little fat.


the key ingredients here are the roasted garlic and some homemade roasted chicken broth
and the key utensil is an immersion blender 

trust me, take the time to roast the garlic...
 eat a roasted chicken this week and make some good broth.  chicken broth from a roasted chicken carcass is like liquid gold.  i always have some on hand in the freezer.  
and... go out and buy yourself an immersion blender.
your soup will be tasty and your puree-ing world will be forever changed.


in a nut shell...roast garlic, saute mushrooms and aromatics, whiz it up with some broth and serve.


BABY BELLA SHIITAKE CREAMY, yet non-dairy, SOUP

3 oz. Baby Bella (Crimini) mushrooms
30 grams dried Shiitake mushrooms
1/2 medium onion
1/2 shallot 
3-4 cloves roasted garlic
approximately 4 cups of chicken broth or vegetable broth...home made is best, but...
2 cans  (15 oz.) low sodium chicken broth will be fine (more or less depending on how thick you like your soup)
NOTE...i used 1 whole can and about 1 1/2 cups homemade chicken broth...
vegetable broth works very well with this for a pure vegetarian version
2 Tbsp olive oil
1 tsp dried tarragon
1 tsp dried thyme
salt and pepper to taste

FIRST...before you do anything...roast your garlic.  i like to roast mine whole with the top sliced off and drizzled with olive oil inside.  wrap in tinfoil.  oven at 370 F and it should take about an hour.

meanwhile, rehydrate your dried mushrooms as the package instructs if using dried.  saute your veggies in about 2 Tsp olive oil (maybe less if possible).   do not salt your veggies while sauteing.  you can add your tarragon and thyme in when they are almost done.  when everything is done and mushrooms look yummy and golden transfer to a sauce pan (3-4 quart works for me).  reserve a few mushrooms for garnish.  squeeze the water from the rehydrated mushrooms and chop them up a little and add them with the roasted garlic cloves to the pot.  add chicken broth, a little less than you think you might need because you don't want your end product to be too thin.  bring to a boil then lower to a simmer.  when everything has been heated through take off the stove and get your immersion blender in there and blend away...blend it to the texture you like.  i like it creamy.  you might need to add more broth at this point (heat through if you add more).  when you have it just right check for seasoning...salt and pepper to your liking.  i like the base creamy, then i add a few whole reserved mushrooms or use as garnish.
reheat just before service.  this soup can be made ahead and keeps well for a few days.

NOTE..the fresh thyme is for presentation and photos only.  i found when eating the finished photographed bowl of soup i didn't care for the pieces of thyme interrupting the smooth creamy texture...you be the judge.


Tuesday, June 28, 2011

Spicy Mexican Glazed Nuts


Oooh...these unassuming little nuggets are...whew!...spicy 
and oh so addicting.


if you want a quick spicy sweet nut recipe, this is a great one.  they turn out really crunchy, slightly glazed and you don't have to do anything on the stove with molten sugar or syrups...a simple egg white along with your spices and a little sugar... in the oven, and the magic spicy glazed coating happens without fail.  these were such a hit with my spice lovin' friends.  i tend to make things a bit spicier than most can handle, and these were just right.  i must say...i used REAL MEXICAN CHILI POWDER.  not the wimpy stuff you buy at a regular market so mine came out extra spicy...AND i used the cayenne.  i suggest you use your judgement on the spices, but if you have a Mexican market near you do yourself a favor and buy the real stuff.  it's cheap and always adds a nice blend of spicy chilies to what ever you're making.


SPICY MEXICAN GLAZED NUTS
adapted from Big World-Small Kitchen and Epicurious

3 cups raw mixed nuts
(i used almonds, pecans, macadamia and walnut)
1/3 cup sugar
1 egg white beaten until white and fluffy
1 Tbsp chili powder
(i used REAL Mexican chili powder...whew!...spicy!)
1 tsp cinnamon
1/2 - 3/4 tsp salt
1/4 tsp ground cumin
1/4 tsp cayenne pepper

preheat oven to 350 F...place rack in the middle

spray baking sheet with non stick spray.  in a small bowl combine sugar and spices.  in a large bowl whisk egg until white and frothy.  add nuts into egg white then add the sugar/spice mixture and stir until everything looks evenly coated

spread nuts evenly onto prepared baking sheet and bake until golden, about 20 minutes.

TIP... i took them out after 15-20 minutes and stirred and separated the nuts...then returned to the oven for approx. 10-15 more minutes.  keep your eye on them.  i think this second baking time helps to keep them crunchy.

TIP... do not store them until they are completely cooled, but do not wait over night to store them.  if they get a little sticky (they shouldn't because of the second bake) you can stick them back in the oven for a few minutes, let them cool, then store again.

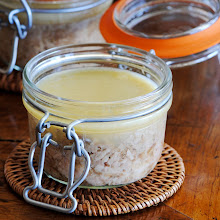
TIP... store in a clip top glass jar with a rubber seal


TIP... also i saved some of those little stay-fresh packets you find at the bottom of other snack foods....you know that annoying little plastic pouch that says DO NOT EAT...DO NOT OPEN.  they look like sugar packets...i put one of those in the bottom of the jar if i have one available.  don't know if it does anything, but i made some nuts 2 weeks ago that are still good and crunchy.

trust me these won't last that long...you'll eat them all up, but i made a sweet glazed version for Dad and he doesn't eat them as quickly as i do


Tuesday, June 21, 2011

Tri-Color Vegetable Terrine


forgive me followers for i have sinned...

it has been 2 weeks since my last post...

i hope the next few goodies will make up for my "writers block".

i've been cooking, shooting and eating loads of good stuff, but i just can't get enough time on the computer to write about it all.  i have about 9 drafts waiting to be finished....you know how it is...just to much selfish playin' around with FOOD.  now i have to get down to business and share what i have found delicious fabulous and fun.


this is a fabulous Tri-Colored Terrine i came across while on one of my terrine hunts.  i'm way in to terrines lately.  i'll be posting about a Collard Green Terrine, along with a Trotter Terrine and hopefully a Vanilla Cherry Chai Jello Terrine if i can ever keep one around long enough to get a photo.


this particular terrine looks fairly simple, but it has some interesting flavors that hit your palate with every bite.  the carrot has a hint of nutmeg and ginger...the cauliflower a hint of lemon zest and the broccoli a touch of scallion and coriander.  it all works together beautifully.
serve alongside your cheese platter for an appetizer...as a first course on top of some fresh greens...or as a lovely side to your main course.  it works well at room temp or slightly warmed before serving.

note...if served right out of the oven you will find this to be more of a dense souffle.  although the flavors will be there, i doubt it will slice very well...and i didn't go through all that layering to present a spoonful of delicious vegetables.  let it set in the fridge.  to get it out of the loaf pan i suggest using the parchment sling method if you are going to invert it for presentation.  OR it's much easier if you just slice it straight out of the dish...CAREFULLY.


TRI-COLORED VEGETABLE TERRINE
adapted from recipe at Cookeatshare by Global Cookbook

3 cups broccoli Florettes
2 cups diced carrots
4 cups cauliflower florets
3 large eggs separated
6 Tbsp fat free cream cheese
3 tsp lemon juice
1-2 tsp lemon zest
1 Tbsp minced fresh chives
1 tsp fresh grated nutmeg
dash of ground ginger
dash of coriander.
salt and fresh ground pepper

preheat oven to 375 F degrees.  lightly oil and line the bottom of a medium glass loaf pan with wax paper or parchment.
blanch the vegetables separately in lightly salted water and shock immediately in cold ice water.  dry vegetables on paper towels or use a salad spinner.
puree the broccoli with 1 egg yolk, 2 tbsp cream cheese and 1 tsp lemon juice.  repeat with the carrots and then the cauliflower. keep your processor clean in between vegetables.
stir the chives into the broccoli with a dash of coriander...salt and pepper to taste
stir the grated nutmeg and ginger into the carrots
stir the lemon zest into the cauliflower

whisk the egg whites until stiff, then carefully fold 1/3 into each vegetable mixture until just combined.
check seasoning in each one.
spoon the broccoli mixture into prepared pan, carefully smoothing the surface.
carefully top with the carrot mixture as not to disturb the broccoli and do the same with the cauliflower, smoothing each layer....this can be a little difficult...have patience.
cover with a piece of lightly oiled wax paper.
place loaf pan in a roasting pan and pour almost boiling water to come 2/3 of the way up the sides of the loaf pan.  transfer to the oven and bake for approx. 40 minutes.  remove wax paper and cook for 10 - 15 minutes longer, till the top feels hard to the touch.  remove from oven and let cool in the pan.

NOTES...this came out much more souffle-like than i had anticipated, BUT DELICIOUS.  really great warm as a side dish or served room temperature as an appetizer with some lovely ripe Brie, Camembert or as shown with a little Maytag Blue.


Tuesday, May 24, 2011

Grandma Hulda's Sweet Dills


GRANDMA HULDA'S SWEET DILL PICKLES

these are a year 'round staple in our fridge...
always has been, always will be a big barrel jar of Grandma's sweet pickles in the back of the fridge.  sometimes i swear at them as i maneuver around that big glass jar to squeeze something new in, but i wouldn't remove them if my life counted on it...or rather if i counted on staying alive through the night.

Grandma Hulda wasn't what you would call a gourmet cook by any means, but she knew how to throw down a few special things...

these pickles are one of those special things 
and i have yet to meet their match in the pickle world.


i must admit, the idea for this post came about quite a few weeks ago.  it originally was to be all about the last surviving chunk of Easter ham and my fabulous low fat Ham Salad...BUT then...out came the pickles from the back of the fridge for the photo shoot.  as i was shooting a big light bulb went on and i  said...
"ham salad = boring"...
"Grandma's Pickles?...everybody loves pickles AND everybody loves something from Grandma."

hence the recipe for the easiest bestest crunchy sweet pickle ever!
they need to be in the back of your fridge on the ever-ready just for that extra little crunch for your salad, sandwich or burger.


pack a cute little jar of your favorite spreadable salad like ham, tuna or chicken and serve with your pickles.  put them along with your cheese platter, hors d'oeuvres or condiments...or...top off with a layer of chopped sweet pickles for a tasty on the go treat.  great for picnics  or just your everyday brown bag lunch.


GRANDMA HULDA'S SWEET PICKLES

what you'll need...

1 46 ounce store bought jar of Hamburger Dill pickles...crinkle cut
3 cups of white sugar
2 Tblsp pickling spice
2 Tblsp apple cider vinegar

drain the juice from the pickles and put them in a large bowl...save the jar, toss the store bought juice.
add the sugar, spices and vinegar to the pickles and stir to combine.
let this sit on the counter for at least an hour, maybe 2, so the pickles can weep out their juices and the sugar dissolves.  you can stir them a few times during the weeping.
put the pickles and all the new juices back in the jar and in the fridge...let set at least 3 days before using.

i must add that these pickles are best over time...and i mean time because after the first batch is gone, you need to save about a cup of the old juice and add it to the new batch.  after the pickles have done their weeping add a little of the juice from the previous batch to cover the pickles.  you might not need the full cup, but it's kinda fun to keep the juice as an on going flavor addition...
not a totally necessary step, but it's how Grandma Hulda did it and i wouldn't change a thing about these pickles.

they're just perfect as is...Grandma Hulda's way.


PS...as for the lower cal Ham Salad?...
try using cottage cheese instead of mayonnaise.
put the cottage cheese in the processor and blend to smooth.
then add chopped ham and just a few chopped pickles.
pulse to a spreadable texture.  don't over process.
season to taste.

you won't miss the mayonnaise if you take care in the seasoning with salt and pepper.  the pickles add just the right sweet/tart flavor...enjoy

Friday, April 22, 2011

Vanilla Bean Herb Homemade Farmer's Cheese


yes, more cheese...this one is FARMER'S CHEESE.  
i love making cheeses and yogurts... continuously trying out different methods, milks and flavors.  am i becoming a cheese head?...should i get a goat in the back yard?   funny thing is...i really don't eat THAT much cheese...it's just so rewarding and i seem to be fascinated with the science behind it.
 Farmer's Cheese is a basic fresh cheese with a slight tang.  it's a great cheese to start with.  when making it at home you can choose the flavors and regulate how hard or soft you prefer.  i don't care for the crumbly type, i prefer it a little moist like a Neufchatel or a very thick cream cheese...easy to slice or wedge but still spreadable...


farmer's cheese is quite delicious and well worth the few hours it takes to create...BUT it was this flavor combo that made it fabulous...

VANILLA BEAN, ROSEMARY, THYME
with a little honey and a pinch of sea salt and fresh pepper

the vanilla bean along with fresh rosemary and thyme from the garden was a hit.  of course, i thought it was something new, but low and behold...i was at the market to peruse the cheese station like i always do and isn't there just a big fat log of goat cheese with the flavor printed right on the front...Vanilla Honey !!!...well, to my credit...i had never heard of vanilla bean in savory cheese before...so there!

do you think i could go as far as...

VANILLA IS THE NEW BLACK...?
VANILLA IS THE NEW BACON...?

i've been obsessed with vanilla beans lately, trying to sneak them into everything i can...  please do try this combo out in something...i've made some thick Greek yogurt and some "Goat-Yo" (goat-yogurt) with these flavors and i love it...i posted about Skyr (Icelandic Yogurt/Cheese) just a few days ago and used the vanilla herb mix in that for a tasty breakfast treat...along with some fresh berries and you're set. 


FARMER'S CHEESE

1/2 gallon whole milk...NOT ultra pasteurized
1/4 cup white vinegar
1 tsp salt
flavor option...1 vanilla bean scraped
1 tsp fresh minced rosemary
1 tsp fresh minced thyme
fresh ground pepper
and maybe a little more salt to taste when cheese is nearly ready...don't over salt in the beginning because it will get more concentrated as the whey drains

make sure your utensils are clean...i read that you should use all stainless steal
heat milk in a large stock pot SLOWLY to 190 F degrees
take off the heat and stir in the vinegar.  the milk should immediately start to curdle
let the milk/vinegar sit for 15-20 minutes

place a large colander over a large bowl or pot.  drape a few layers of cheesecloth or fine muslin over the colander.  pour the cheese curds into the cheesecloth.  the whey will drain and the solid curds will remain in the cloth.  i let this sit on the counter for about an hour so that most of it drains.  when the dripping slows, pick up the 4 corners and squeeze more whey out...or what i  like to do is tie up  the corners and hang from a wooden spoon or something...keeping something under to catch the dripping whey.  when you feel the cheese is hard enough to shape and the dripping has stopped, unwrap it and take a peek.  i like to taste it at this point...add salt if necessary.  if it looks too "curdy and crumbly" put it in a bowl and stir (or mash it together with a fork)  to bring it together...more spreadable.  take the ball of cheese and pack it into a mold...i find that a ramekin works well.  cover and refrigerate.  you might want to line your mold with plastic wrap for easy removal if you are looking for a cheese that will stand alone (as shown in photos).  sometimes i will just use it straight out of the ramekin if there's no need for presentation.

your fresh Farmer's Cheese should be ready in a few hours.  enjoy
this is a fersh cheese so it should be eaten within a week to 10 days.

Sunday, December 19, 2010

SWEET POTATO SPOON BREAD


WOOPS !...i almost forgot about this delicious SPOON BREAD.  i never know why they call it bread, it truly isn't bread.  i did, however, cook this in a loaf pan...does that make it bread ?...it's got a little cornmeal in it...does that qualify as bread ?...
geez, who cares if it's bread or not...it's DELICIOUS !!!  so  easy, fabulous and almost like a fancy souffle.  impress your holiday table with this light and flavorful perfect side.  as a matter of fact, i think i'll make it again for X-mas dinner.  if there's any left-overs, serve this for breakfast or brunch with a fried egg and some leftover ham.  or a poached egg nestled in a big spoonful of this...hmmmm 
look at me...already planning for my left-overs...

I JUST LOVE THE MEAL AFTER THE MEAL.

SWEET POTATO GINGER SPOON BREAD
adapted from Whole Living Magazine

1/2 cup corn meal
12 oz. sweet potato
1 1/2 cup 1% milk
2 large eggs separated
2 extra large egg whites
2 Tbsp maple syrup
1 Tbsp fresh grated ginger
1 tsp salt

bake sweet potato until cooked through.  let cool slightly, remove skin and mash.  let cool a little more.  bring milk to a simmer on the stove.  whisk in cornmeal and continue whisking as the cornmeal cooks, approx. 2 minutes.  remove from heat.

preheat oven to 350 degrees.  spray 8 x 8 glass baking dish with non stick...i halved the recipe and used a 9 x 5 loaf pan....works great.

stir together mashed potatoes, cornmeal mixture, egg yolks, ginger, salt and maple syrup in a large bowl.  using an electric mixer, whip egg whites until very stiff peaks form.  stir (good stir, not fold) stir in 1/2 egg whites into potato mixture.  GENTLY FOLD in remaining half egg whites.  spread into casserole dish and bake for 35 minutes or until set.

CRUSHED BACON and or CANDIED PECANS might send this over the top !!!


Thursday, August 5, 2010

CELERIAC Cabbage and Corned Beef

CELERIAC..

one of my new favorite vegetables...or is it really considered a veg. i think it might be in the "OFFAL" category of vegetables. it's not one of the most attractive items in the produce aisle. that's probably why i had to buy one and give it a go...


i would have to say the celeriac and cabbage was my favorite part of the meal, but the corned beef was excellent as well. the combo of the two was perfect. what normally would be considered a heavy St Pattie's Holiday meal turned out to be quite a light and delicious treat for a summer evening. the lightly sauteed celeriac/cabbage mixture really kept the meal fresh and clean kind of like a warm slaw salad. one doesn't usually think of corned beef except once a year, but did you consider the leftovers?...mmmm mmm mmmm...nothin' like a good homemade corned beef on bakery fresh rye when you least expect it.


WARM CELERIAC CABBAGE SLAW
1/2 celeriac-cut the outside ugly part off. cut into 1/2" or so slices so that you can use a peeler to make some nice long strips. (you can see in the photo above)
approx 1/2 head of small white cabbage-large shred
1/2 large onion french cut.(1/2 rings will do fine, but like i french cut better)
2-4 thin sliced garlic
herbs of choice or what's on hand
a small amount of cooking liquid from main dish or just some nice chicken broth
salt and pepper AFTER it's cooked


EASY PEAZY INSTRUCTIONS
saute onion and garlic in a small amount of olive oil
add celeriac, cabbage, fresh herbs if using and small amount of broth or cooking liquid. this is where i just spooned in some of the liquid from the slow cooker corned beef. you want just enough to help cook the veg a little, but not to soak or drown them. try to keep this like a warm slaw. don't over-cook. take it off the heat before you think it's done. check for seasoning. salt after it's cooks to keep it from weeping. you'll know when it done to your liking. half my family likes it a bit crunchy and the other half likes it all the way cooked...


CROCK POT CORNED BEEF
Prep Time: 25 minutes
Cook Time: 8-9 hours
Ingredients:
•6 carrots, cut into chunks
•2 onions, chopped
•2-3 lb. corned beef brisket with seasoning packet
•12 oz. can beer (non alcoholic is fine)
•2 Tbsp. yellow mustard
•1/4 cup brown sugar
•1 cup water

Preparation:
In 4-6 quart crock pot, combine carrots and onions. Rinse corned beef under cold running water and pat dry with paper towels. Place in crock pot and sprinkle with contents of seasoning mix. Pour beer over brisket and spread mustard on brisket. In small bowl mix brown sugar with water and pour over brisket. Cover crock pot and cook on low setting for 8-9 hours.
Remove corned beef from crock pot and cover with foil to keep warm if serving soon. at this point it's a bit hard to slice, but shreds great of falls into big lovely melt in your mouth chunks. i like to put it in the fridge (after eating my "fair chefs share") for a few hours or over night so that it can be easily sliced (as shown in photo)...this is truly the tasty way to cook a corned beef...no hassle and always come out prefect. it's hard not to eat half of it before it goes in the fridge, but you'll see how much easier it is to get a good slice after it's been chilled. oh...it heats up really well in the microwave, just don't over do it and you'll be fine.
warm or cold...this makes for an unlikely fabulous tasty summer meal...breakfast, lunch or dinner. i think i'll make another this week end...hmmmmmm.

Wednesday, July 7, 2010

LENTIL SOUP with ROASTED VEG. and SAUTEED APRICOTS


woops...i almost for got about this delicious soup. i'm so behind with my posts that i almost left this one behind. can't do that. this one is good and easy...a little time consuming if you're fussy about presentation like me. i think the sweetness of the apricots really works well with the savory roasted vegetables. i love the texture of lentils when they are cooked just right...tender to the bite, but still in their cute flying saucer shape. keep it monochromatic for an interesting presentation...anything orange is fun to work with. always bright, flavorful and comforting.


LENTIL SOUP with ROASTED VEG. and SAUTEED APRICOTS

1 cup red (orange) lentils
4-5 cups good chicken stock (homemade best, of course)
2 Tbsp olive oil
1/2 large onion. diced
1-3 cloves garlic. minced
1 tsp oregano
a pinch of cayenne
salt and pepper to taste after cooking
3 carrots
2 cups banana squash or butternut. peeled, cubed
1 orange pepper large dice
5-10 garlic cloves for roasting (optional)
feta for topping (optional)
approx 10 dried apricots (whole)

make the lentil base...in a soup pan saute the onion and garlic. add the stock and lentils and bring to a boil. lower heat and cook until tender. i like my lentils to keep their shape so i pull them before they get mushy. remember they will continue cooking as you reheat the soup. check seasoning.
roast your vegetables at 350 degrees approx 20 minutes. olive oil, salt, and pepper. keep an eye on them and stir to brown all sides
3 med. carrots. sliced large
2 cups small cubed squash. i used banana squash. peeled, of course
garlic...i always throw in a bunch of garlic cloves when roasting veg. just to have on hand and/or add this to the soup/stew for extra yummy goodness
saute the apricots...i used a little olive oil and sauteed, or rather, seared the dried apricots. you could saute them with a little garlic and onion if you wanted, but i didn't. i left them whole so i could brown each side....dice when browned

serving suggestion...build your soup/stew plate. if you're one of those "on-the-ball-cooks" you'll have everything hot at the same time...not so in this kitchen. i have to bring everything back to temp. before serving.

i like this soup thick and layered...lentils (drain off some broth if necessary) then roasted vegetables then crumbled feta (optional)then diced sauteed apricots on top.

note...stir and reheat lentils carefully because they can turn to mush and lose their shape quickly.

if your not into the fuss and presentation just throw everything in, serve and enjoy. i thought the sauteed apricots really worked well with the roasted veg, garlic and the kick of heat from the cayenne. sweet...savory...spicy equals YUM in my book

Thursday, July 1, 2010

TOFU SATAY with PEANUT SAUCE

TOFU SATAY with PEANUT DIPPING SAUCE...

i never thought i'd see the day that i could honestly say...I LOVE TOFU !

well, i'm not really that in love with it...i am a pork lover that's for sure. if you can wrap it in bacon or cook it with duck fat i'm all over it. hey...i think the next tofu creation/experiment will have to be confit tofu wrapped in bacon...hmmmmm good idea, i might try that this weekend. but seriously, i do really like this recipe. if you're a little unsure about the tofu try it with chicken, i did and it was super fabulous. friends told me it was one of their favorites and demanded the recipe.

SATAY MARINADE

i found this while googling around for recipes with TOFU. i guess Daring cooks took on the satay challenge a while back and i came across this great idea from a fellow blogger... Mango & Tomato. i've always loved satay with it's yummy peanut dipping sauce so this seemed like a safe way to break into the world of TOFU
below is just the satay marinade recipe i found at Mango & Tomato. i'm sure her peanut sauce is fabulous, but i used another due to ingredients on hand. the one i made turned out incredibly finger lickin' good.
SATAY MARINADE
1/2 small onion
2 garlic cloves
2 cm piece of ginger
2 T lemon juice
1 T soy sauce
1 tsp ground coriander
1 tsp ground cumin
1/2 tsp ground turmeric

Directions
1. Puree all ingredients in the food processor (how easy is that?).
2. Marinade cubed tofu covered for 2 hours in the refrigerator.
3. Saute the tofu on all sides till golden brown (I used coconut oil).
i only used 1 block of tofu, but this is enough for 2
if using chicken (1.5-2 lbs boneless, skinless) cut in large cubes
i sauteed the tofu
i skewered and grilled the chicken
tip for chicken...wrap in foil as soon as it's just done to keep in moisture)
PEANUT DIPPING SAUCE
found here at Recipekitchen

1/2 cup peanut butter, creamy (i used 1/4 creamy and 1/4 chunky)
1/2 cup water
1/4 cup soy sauce
4 garlic cloves, minced
3 Tbl. lemon juice
2 Tbl. brown sugar
3/4 tsp. ground ginger (i added a little grated fresh ginger as well)
1/2 tsp. red pepper, crushed flakes
heat all ingredients in a sauce pan on low-medium heat. stir well about 5 minutes so all flavors will meld. add more water if it's too thick. it will thicken as it cools so if serving at room temp. be aware of this. the sauce saves well for leftovers. just give it a stir and a reheat.
to my amazement the tofu held up quite well the following day. good as new with a quick microwave (don't over nuke)..quite resilient i must say.
i will definitely be making this again, with both TOFU (in the fridge right now) and with Chicken. it's easy and a sure bet for Satay lovers. keep the recipe out because you'll be asked for it i'm sure.

Monday, April 12, 2010

ROASTED BANANA SQUASH with TARRAGON

lately i think i have been at a loss for words, but for this post i think just the few ingredients shown speak for themselves. i've been doing quite a bit of roasted vegetable purees, soups and sauces in the past few weeks, but i think this combo of banana squash, garlic, baby onions and lovely fresh tarragon was so pretty and rustic looking that i just let it be. normally it would be headed for the stick blender and pureed to a silky smooth golden soup/sauce, but i took one bite right out of the oven and thought best to leave this one alone. the first night i had it with crispy Duck a l'Orange. the duck recipe called for fresh tarragon so i thought i would carry the flavor into the veg. now i'm stuck on tarragon. it seems like the forgotten herb. maybe it's not forgotten, but i certainly don't see it used much. i really like what it adds to a dish so i bought another packet yesterday and i can't wait to sneak it into more things. i think i'll try it in some soda bread or an orange tarragon muffin?..what about a sweet savory shortbread cookie?...hmmm


banana squash...i love this squash. i just discovered it this winter. maybe you all have had it before, but it's a new one to me. might be the fact that the name alone scared me off....i don't eat bananas. don't like 'em, never have. i'm glad i tried it because i think it's most similar to fresh pumpkin in texture and flavor. we ran out of fresh pumpkins around here just a little too soon. as a matter of fact, there was even a shortage of canned pumpkin in the stores. i spoke to the manager at Bristol Farms and he said that Libby's was thinking of going seasonal with their canned pumpkin puree until the economy picks up. now i don't know about you, but how will this help or hinder the economy? is this going to make or break Libby's? another market, Gelson's, said everyone was buying it like it was going out of style. they still have a supply on their shelves even after i wiped them out one day. what if they run out? October is a long way away. I NEED MY PUMPKIN !...i make a protein pumpkin pie every week that i eat every morning for breakfast so the shortage make me nervous. i'm lost without my pumpkin fix.

so for now i will substitute my roasted pumpkin with BANANA SQUASH. i know most would say just use butternut squash, but that's a whole different flavor and texture. don't get me wrong...i DO love butternut squash, but it is a bit more sweet than the banana.


SIMPLE ROASTED BANANA SQUASH w/GARLIC AND TARRAGON

preheat oven to 350 degrees

1 large 1/4 of a banana squash
peel and cube. i like fairly big chunks

peeled garlic. 10-20? your choice. i like plenty for the garlic lovers. the "haters" can just omit them from their plate. they are left whole, so it does not really effect the cooking flavor until you incorporate them as puree.

10 baby onions

2 Tbsp finely chopped tarragon

salt and pepper

i like a little garlic salt

throw this all in a big baggie and drizzle in some olive oil

toss this around to coat everything

lay out on foil covered (easy clean up) cookie sheet

bake for 20 minutes and stir around. make sure all pieces are getting roasted. you might need to add a bit more olive oil. the squash seems to absorb, but don't go over board.

continue baking, stirring and checking every 10-15 minutes until fork tender.

ready to serve.

i like to make alot. leftovers are yummy throughout the week. easy to change up and serve them again as a thick puree for a side dish or blend with a little stock and make a fabulous soup.

Thursday, March 11, 2010

SUNCHOKE, LEEK AND TERRAGON SOUP

hands down..THE BEST SOUP I HAVE EVER MADE

sunchokes, if you can get your hands on some of these ugly little devils, do it. ask your produce guy if he has any and where they are hiding. you might have already passed them by thinking it was ginger. as you can see in the photo above they do resemble my best new friend the ginger knob. (side bar..i'm on a ginger kick !). i've read that there is a small window of opportunity for the elusive sunchoke and i think the window is open right now. i forgot about these little gems. i remember quite a few years ago i used to eat them just boiled...i found them interesting because someone told be they taste like artichoke, and they DO! they pretty much taste like artichoke hearts without having to whittle your way down to the best part...the whole thing is the best part. they aren't even related to artichokes. wierd...huh?...they are from the sunflower family. click here for more info on the sunchoke...Jerusalem artichoke.


so, about this soup...easy peezy. this could absolutely be the star at a dinner party. as a starter or even the main course, i think your guests would be impressed. i even thought it worthy of dragging out the Hermes dinnerware...need i say more?...ok, i will. i don't know why i thought this soup was so over the top. you might wonder if i get out much. while i'll admit i'm not a huge soup connoisseur, i do know good taste and texture when it passes my lips. maybe this is no big new flavor for all you foodies out there, but the combo of the sunchoke, leeks, roasted garlic and fresh tarragon, might i even say, "dee-vine"?...a definite winner in my books. the sunchoke does resemble artichoke, but i've never had artichoke soup either and who wants do deal with artichokes. all the thorny leaves and the hairy inside just to get to the heart? besides, i think the sunchoke definitely has a different consistency. i'm thinking it has a more starchy effect. i read somewhere it's a good substitute for potatoes (starchy) if you're a diabetic or watching your glycemic index. it's lower on the scale than potatoes and won't spike insulin levels like some starches do. don't quote me on this, please.

i found quite a few recipes for this soup or something similar to it. as i was cooking i kind of adapted a little something from each one. i think i had 3-4 recipes out on the table. the recipe i have for you below was adapted from C.L. at Wellsphere. hers seemed most like the soup i had in mind...and besides it's adapted from Thomas Keller. if you want to make a good soup, you can't go wrong with something out of Keller's kitchen....EDIT-after i have now just glanced at T.K.'s original sunchoke soup recipe, i see that his is, of course, a bit more complex. the one below is much more simple and quite a bit...alot...easier on the ol'waistline.

CREAMY SUNCHOKE SOUP

adapted from C.L. at Wellsphere who adapted it from Thomas Keller

Ingredients:
1 to 1 1/2 pound sunchokes
1 large leek, white part and an inch of the green portion, rinsed well
1/2 onion. chopped
1-3 cloves garlic...i like allot.
2 tablespoons butter or olive oil...enough to saute leeks, onion and garlic
1/4 teaspoon white pepper
pinch of sea salt
4 cups reduced-sodium chicken broth
5-6 roasted garlic cloves
1/2 tsp dried oregano
2 full Tbsp fresh chopped tarragon. extra for garnish
1/2 cup cream...optional

MY NOTES...and instructions...

important-***no need to peel chokes. just clean them good and scrub off any dark parts and nubby parts (the whole thing is a nub so don't scrub too hard ok?)

cut into approx 1" pieces and drop them into a bowl of water with a little lemon (they will turn brown like a potato if you don't).

saute the leeks onion and garlic until translucent in large pot or dutch oven.

drain the sunchokes out of the lemon water and add to pot and pour in chicken stock. 4 cups (maybe more) or enough to cover everything by about 2".

i had some roasted garlic cloves in the fridge so i threw those in. about 5-6...i think this is a must. the roasty flavor really added an extra layer.

add 1/2 tsp dry oregano and a little fresh ground pepper.

bring to a boil then turn to a simmer. my sunchokes took about 45 minutes to get fork tender. it really depends on how large you cut the pieces. just remember you'll need them soft enough to blend into a creamy soup. keep an eye on them while they are simmering. don't let them go too long or they will start to fall apart like a potato.

when fork tender turn off and get out your immersion blender. you can use a stand blender, but i suggest getting an immersion(stick) blender. much easier. the beauty of the stick blender is that you finish off the soup in the one pot.

no need to strain or get the chinoise, just blend until there are no chunks, lumps or bumps.


i like to season at this point(salt and pepper). you might need to add more stock if it reduced while simmering. it also depends on the consistency you want to end up with....are you adding cream or not...

as for the cream...you can blend some in before serving or give your guests the choice. i prefer mine without, but the rest of the family likes the swirl of cream.

i'm not a good judge of how many servings this should make because, again, it depends on how thick or thin you like your soup. i would say 4-6 full servings and maybe even 8 first course or side servings.
i hope you enjoy this as much as i did...i found myself licking the bowl...amongst family, of course.

Saturday, February 27, 2010

SIMPLE ROASTED VEGGIE SOUP


ROASTED VEGGIE SOUP...i know we've seen a bucket-full already this winter, but i don't think it can be said enough how easy and rewarding this little "bowl of gold" can be. the color, texture and flavor are well worth the few simple tasks it requires for this wonderful, smooth, savory pureed soup.

there are so many ways to prepare this soup and all of them are good. for instance some say cut the squash in half and roast it cut side down on a cookie sheet. some say boil the squash cubes in broth. some say butternut only. some say this and some say that. i can only tell ya what I SAY...

i say..use peeled and cubed squash because it gives a more roasty per square inch flavor.

for this batch i chose the ever popular butternut squash. the week before i used banana squash which was very similar to pumpkin. during pumpkin season i went wild with those cute little pumpkins. i kept buying them for decoration, but they would end up in a soup before the week was up. there's nothing like that pure, rich, deep orangy pumpkin meat.

HOW TO...

choose your squash. something like a med. size butternut.

peel and cube

2 small onions quartered (leave root end on so they don't fall apart)

5-10 cloves garlic (i like alot) peeled before or after roasting...just watch it. you might have to remove cloves before the squash is done

spread everything on a large cookie sheet

drizzle with olive oil

season with salt pepper and garlic salt

toss around on the sheet so everything is coated

roast in a 375 degree oven. approx 45-50 minutes

check every 10-15 minutes and stir

done when fork tender

now..put all your yummy roasted veg. into a deep stock pot and cover with approx. 6 cups of stock. i prefer homemade chicken broth. boxed or canned will be just fine. vegetable or beef is good too. what ever you have on hand.

cover veggies by an inch or two. remember you can always thin out your finished product by adding more stock, but you can't take it out.
add 1-2 tsp dried oregano

1 bay leaf

bring to boil and immediatly turn to a simmer for 15-20 minutes

get out your immersion blender or GO BUY ONE...

a stick blender makes life so much easier in the creamy soup world. of course you can use your stand blender or food processer, but it's such a mess and if you've never pureed hot soup before. it can be quite dangerous. just go get a stick (immersion) blender. you'll love it and use it all the time.

remove bay leaf and blend untill smooth and creamy.

check seasoning and add what's needed.

at this point you can thin it to your preferred consistancy with some more stock . my mother likes to add milk or cream, but i like the pure veggie taste. when left a bit thick this makes a great pasta sauce or is just fabulous under roasted chicken or fish as a nice color addition to the plate.

so...starter, main course...soup or side dish?...i like to keep something like this in the fridge as a staple for those cold rainy days or those "WHAT WILL WE HAVE FOR DINNER?!" nights. this will always add some color and make any quick meal feel homemade and slaved over.


Saturday, October 17, 2009

ROASTED BUTTERNUT SQUASH, GARLIC, SAGE PUREE


i know we'll probably see a zillion recipes for butternut squash soup in the next few months, but this one isn't really a soup, although you can just add a little more stock and a splash of cream to make it a warm, fall-ish bowl of gold. actually i found it in a health magazine and it was presented as a healthy alternative pasta sauce teamed up with some whole wheat pasta. yum!
i opted for a thick rich puree used under large pan seared scallops. not only was in tasty, but the color was so vivid and visually appealing.


so easy..it's just the darn prep work that takes a bit of time. of course, after the fact, i realize i could have bought already peeled garlic and ready skinned and diced butternut, but where's the fun in that?...sometimes the dish tastes just a bit better with a hint of sweat in the mix...right?
one of my least fav savory chores is peeling garlic AND skinning and cutting up those butternuts is not pleasant either. i know you can roast the butternut in halves, but i think the diced lends itself to the flavor more. more roasting area equals more roasty flavors.


this thick puree also is great for plate decor. i made these three quick swipes with a spoon and they stayed nicely for maybe 20mins or so. i say this because if you were serving quite a few people the plate would hold up well for service. didn't run or get watery like some do. maybe it's due to the trace oil and controlled chicken stock addition.

RECIPE...
well, as i often find...some of the best things have the fewest ingredients.

peel and cube a med. size butternut squash
peel a whole head of garlic (i love garlic, really LOVE roasted garlic)
lightly toss with some good olive oil, salt and pepper to your liking.
now, if i were making it for myself alone, i would have put some heat in there. a little sprinkle of cayenne or chili arbor would do the trick.
put this in a large baking pan or cookie sheet. best if they are all out flat and not piled up.
400 degrees. get in there and toss it all around about every 10 mins 'till it all looks nice and roasty and the squash is fork tender. remove it from the oven and while it's still warm toss it with approx 1/4 finely chopped FRESH sage. i say approx because butternuts come in a wide variety of sizes, so just use a little more than you might think, i did, and was pleased with the flavor of the sage singing throughout.
now put this all in a nice tall sauce pan (you'll want to use a wand blender so chose your pan accordingly) add a little chicken stock. just a minimum at first untill you get the desired consistancy. season to taste and
VOILA...done...could that be any easier?
IMPORTANT...i think a hand/wand blender is manditory for this type of stuff. in fact, i think they should be manditory for every kitchen. i use mine all the time. so much easier than a stand up blender (which would not work for this thick of a puree) and a heck of alot cleaner and easier than the big ol' cuisinart.

the rest of the family had it as soup the next night and i enjoyed as a side a few times after that...so it holds up really well, again, it didn't get watery.
the following week i did the same thing with a sweet pumpkin...you want to talk difficult peeling and cutting?...but well worth it. so well worth it i bought another and need to go down staires and get started right now.
maybe i should stop by the garage and get the chain saw...?
PS...update...the sweet pumpkin i just had was unbelievably good. i did the same as above, BUT sprinkled just a hint of pumpkin spice on before roasting. still couldn't add the cayenne (wimpy palettes in this house), but the pumkin spice is a must try. by the way, i like to make my own pumpkin spice by mixing
1/2 t. ginger, 1/2 t. ground clove, 1/2 t. allspice, 1/2 t. nutmeg and 1 t. cinnamon...much better than that already made store bought stuff.
Related Posts Plugin for WordPress, Blogger...